DIY Dining Room Table With Leaves: A Comprehensive Guide
Embarking on a DIY dining room table with leaves project can be a rewarding endeavor, allowing you to create a custom piece that perfectly complements your space. Whether you're a seasoned woodworker or a novice looking to tackle a new challenge, this guide will provide you with all the essential information you need to build your own dining room table with leaves.
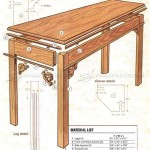
Materials and Tools
Before you begin, it's crucial to gather the necessary materials and tools. Here's a comprehensive list to get you started:
- Hardwood lumber (oak, maple, cherry, etc.)
- Table legs (metal, wood, or a combination)
- Wood glue
- Clamps
- Circular saw or table saw
- Jointer and planer (optional)
- Router
- Drill
- Sandpaper
- Finish (stain, varnish, or paint)
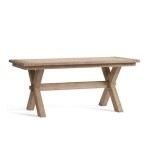
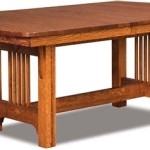
Designing the Tabletop
The tabletop is the centerpiece of the table, so it's important to carefully consider its design. Determine the desired shape, size, and thickness of the tabletop. If you're using leaves, plan for their placement and mechanism.
For strength and durability, it's recommended to use solid wood for the tabletop. Join the boards together using wood glue and clamps, ensuring a secure and level surface.
Creating the Leaves
The leaves are an essential component that adds flexibility to your dining table. They should be designed to fit seamlessly into the tabletop and extend the seating capacity when needed.
Construct the leaves using the same materials and joinery techniques as the tabletop. Consider using a butterfly mechanism or a breadboard end design to ensure a stable and secure connection.
Attaching the Legs
The legs provide support and stability to the table. You can choose from a variety of materials and styles, depending on your personal preference and the overall design of the table.
Secure the legs to the tabletop using screws or bolts. Ensure that the legs are evenly spaced and provide ample support to the tabletop and leaves.
Finishing the Table
Once the table is assembled, it's time to finish it to your desired aesthetic. Sand the entire table thoroughly to remove any rough edges or imperfections.
Apply a stain, varnish, or paint to the table to enhance its beauty and protect it from wear and tear. Allow the finish to dry completely before using the table.
Conclusion
Building a DIY dining room table with leaves is a fulfilling and rewarding experience. By following these steps and paying attention to the essential aspects, you can create a custom piece that will add charm and functionality to your dining room for years to come.

Diy Dining Table With Leaves Houseful Of Handmade

Diy Farmhouse Table With Extension Leaves Plans Sweet Tooth Life

Diy Dining Table With Leaves Houseful Of Handmade

Diy Farmhouse Table With Extension Leaves Plans Sweet Tooth Life

Diy Farmhouse Table With Extension Leaves Plans Sweet Tooth Life Dining

Extension Dining Table Finewoodworking

Newest Free Of Charge Farmhouse Table With Leaf Tips Creating A Is Just Fairly Diy Dining Room Kitchen

Diy Farmhouse Table With Extension Leaves Plans Sweet Tooth Life

How To Build Farmhouse Table With Extension Leaf Dining Room Rustic

Diy Table Leaf For Vintage Dining Scavenger Chic