How to Make a Cribbage Board Coffee Table
A cribbage board coffee table is a unique and functional piece of furniture that combines the enjoyment of a classic card game with the practical use of a coffee table. This project requires some woodworking skills and tools, but it is a rewarding endeavor for those who enjoy crafting and playing cribbage. This article will guide you step-by-step through the process of building your own cribbage board coffee table.
1. Design and Planning
Before starting the construction, carefully consider the design and dimensions of your cribbage board coffee table. The size and shape of the table should align with the available space in your home. The cribbage board should be large enough for comfortable play and should be seamlessly integrated into the overall design of the table.
Here are some design considerations:
- Size and Shape: Determine the overall dimensions of the table, including the height, length, and width. Consider the size of the cribbage board and ensure sufficient space around it for playing and using the table as a coffee table.
- Materials: Choose suitable materials for the table top, legs, and cribbage board. Popular choices include hardwood for the tabletop and legs, and a contrasting wood for the cribbage board. Consider the style and appearance of your furniture when selecting materials.
- Style: Select a style that complements your existing furniture. You can opt for a modern, rustic, or traditional design. Consider incorporating elements like decorative trim, carvings, or inlays to enhance the aesthetic appeal.
- Cribbage Board Features: Determine the features of the cribbage board, such as the size of the playing area, the number of pegs, and any additional design elements like scorekeeping tracks or decorative accents.
Once you have finalized the design, create a detailed plan with dimensions and materials list. This will serve as a guide throughout the construction process.
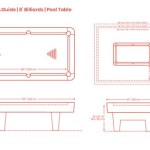
2. Building the Coffee Table Base
The foundation of your cribbage board coffee table is the base, which provides support and stability. Building the base involves creating the legs and attaching the tabletop. For this project, let's assume you've opted for a simple rectangular base construction. You can choose a more complex design if desired.
Here's how to build the base:
- Cut the Legs: Cut four pieces of hardwood to the desired length for the legs. Ensure they are square and uniform in length.
- Attach the Legs: Using wood glue and screws, attach the legs to the underside of the tabletop, ensuring they are positioned at the corners and create a stable structure. You can also use a router to create a dado or mortise for a more secure joint.
- Reinforce the Base: For added strength, consider adding stretchers or bracing under the tabletop to prevent warping or movement.
- Finish the Base: Sand all surfaces of the base smooth and apply your desired finish, such as stain, varnish, or paint.
As you assemble the base, periodically check for squareness and ensure all components fit together correctly. A well-constructed base will provide a sturdy foundation for your coffee table and cribbage board.
3. Crafting the Cribbage Board
Now, the fun part: creating the cribbage board. This involves carefully crafting the playing surface and integrating it into the tabletop. You can purchase a pre-made cribbage board or construct your own from scratch. Let's focus on building your own, as it adds a personal touch.
Here are the steps involved:
- Choose Wood: Select a wood that complements your coffee table, such as maple, cherry, or walnut. Choose wood that is free of knots and defects.
- Layout and Cut: From your chosen wood, cut out a rectangular piece for the cribbage board. Mark the playing area, scorekeeping tracks, and peg holes onto the wood using a pencil and ruler.
- Create the Playing Area: Employ a router or chisel to carve out the playing area and scorekeeping tracks. This area is typically a rectangular shape, with the scorekeeping tracks being cut out along the sides of the board.
- Drill the Peg Holes: Drill holes for the pegs at the designated locations on the playing area. The holes should be large enough to accommodate the pegs but not too loose.
- Sand and Finish: Sand the cribbage board surface smooth and apply your preferred finish, such as varnish or oil.
When crafting the cribbage board, pay extra attention to the accuracy of the measurements and cuts. Carefully aligning the playing area and scorekeeping tracks ensures a functional and aesthetically pleasing board.
For those who want to elevate their cribbage board, you can experiment with inlays, decorative edging, or customized scorekeeping tracks. These enhancements can personalize your board and make it a truly unique piece.
4. Integrating the Cribbage Board with the Tabletop
Once you've crafted your cribbage board, you need to seamlessly integrate it with the tabletop. There are different methods for achieving this, depending on the design and materials you've chosen.
Here are a few options:
- Flush Mount: You can mount the cribbage board flush with the tabletop, creating a flush surface. To achieve this, cut a recess in the tabletop that fits the cribbage board perfectly. This method requires precise measurements and execution.
- Inset Mount: You can create an inset mount by creating a slightly raised frame around the cribbage board. This technique adds visual interest and elevates the cribbage board. To achieve this, you can create a rebate around the cribbage board and inset it into the tabletop.
- Overlay Mount: This method involves attaching the cribbage board directly on the tabletop. This is the easiest method, but ensure you use a secure adhesive and consider the thickness of the cribbage board to ensure a level coffee table surface.
Before you permanently attach the cribbage board, consider the alignment and aesthetics. Ensure the board is positioned correctly and fits seamlessly with the overall design of the coffee table. You can use clamps to hold the board in place before securing it with glue and screws.
5. Finishing Touches
Once the cribbage board is integrated into the table, you can add finishing touches. Consider adding decorative elements, such as a table skirt, a shelf for storing playing cards, or a custom-made storage box for the pegs.
You can apply a final coat of polish or protective finish to the entire table to enhance its appearance and lifespan. Don't forget to sand and smooth all surfaces to ensure a comfortable and safe coffee table.
Remember to always use safety equipment like eye protection and dust masks when working with tools and finishes.

Diy Cribbage Board Coffee Table With Pegs Kit Cabin Furniture Do It Yourself

Cribbage Coffee Table Woodworking Outdoor Furniture

Cribbage Coffee Tables

Cribbage Coffee Table With Pegs And Foldable Legs For Easy Storage When Not In Use
.jpg?strip=all "Cribbage Coffee Table")
Cribbage Coffee Table

Cribbage Coffee Table

Cribbage Coffee Table

Cribbage Table Diy Crib

How To Make A Cribbage Board Quora

Cribbage Coffee Table
Related Posts