How to Craft a Plexiglass Sewing Machine Extension Table
Expand your sewing workspace and enhance your crafting experience with a custom-made Plexiglass sewing machine extension table. This guide will delve into the essential steps and techniques involved in creating a functional and stylish extension table that complements your sewing setup.
Materials:
- Plexiglass sheet (1/4 inch or 6 mm thickness recommended)
- Acrylic ruler or measuring tape
- Pencil or fabric marker
- Jigsaw or handsaw
- Sandpaper or sanding block
- Drill with a 1/8 inch or 3 mm drill bit
- Countersink drill bit (optional)
- Screws or bolts and nuts
- Wrench or screwdriver
Instructions:
Step 1: Determine the Dimensions
Measure the length and width of your sewing machine's table. Add the desired extension length to the measurements and mark the dimensions on the Plexiglass sheet.
Step 2: Cut the Plexiglass
Use a jigsaw or handsaw to carefully cut the Plexiglass to the desired shape. Ensure straight and clean cuts for a professional finish.
Step 3: Sand the Edges
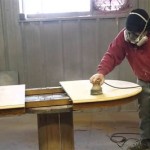
Smooth the cut edges of the Plexiglass using sandpaper or a sanding block. This will prevent any sharp edges and enhance the overall aesthetics.
Step 4: Drill the Holes
Align the Plexiglass extension table with the sewing machine's original table and mark the holes for mounting. Use a drill to create holes with a diameter slightly smaller than the screws or bolts you will be using.
Step 5: Countersink the Holes (Optional)
For a more polished look, countersink the holes slightly using a countersink drill bit. This will allow the screw or bolt heads to sit flush with the surface of the table.
Step 6: Mount the Extension Table
Place the Plexiglass extension table over the sewing machine's table and align the holes. Secure the extension table by inserting screws or bolts through the holes and tightening them with a wrench or screwdriver.
Tips:
- Use a sharp jigsaw or handsaw blade for precise cuts.
- Wear safety glasses and gloves while cutting and sanding.
- If the Plexiglass sheet curls slightly, place a重物 on it to flatten it before cutting.
- Consider using clear or frosted Plexiglass to match your sewing machine's aesthetics.
- Add a non-slip surface to the bottom of the extension table for stability.
Congratulations! You have successfully created a Plexiglass sewing machine extension table that will enhance your crafting workspace and elevate your sewing experience. Enjoy the added convenience, functionality, and style that this custom-made addition brings to your sewing setup.

Making A Custom Sewing Machine Extension Table Tutorial Quilting Jetgirl

Making A Custom Sewing Machine Extension Table Tutorial Quilting Jetgirl

Making A Custom Sewing Machine Extension Table Tutorial Quilting Jetgirl

Home Made Plexiglass Sewing Machine Extension Table Can Use Dowels And Leveling Feet Tables

Making A Custom Sewing Machine Extension Table Tutorial Quilting Jetgirl

Sewing Machine Extension Table How To

Handmade Extension Table For Sewing Machine

Diy Sewing Machine Extension Table

Sew Steady Large Table 18 X 24

How To Make Your Own Sewing Machine Extension Table


