DIY Patio Table with Built-In Beer and Wine Coolers
The creation of a DIY patio table with integrated beer and wine coolers represents a practical and aesthetically pleasing addition to any outdoor living space. This project combines woodworking skills with functional design, resulting in a centerpiece that enhances social gatherings and outdoor relaxation. The following article will detail the planning, construction, and finishing of such a table, providing a comprehensive guide for individuals with intermediate woodworking experience.
Planning and Design Considerations
Before commencing the physical construction of the patio table, a thorough planning phase is crucial. This involves determining the dimensions of the table, the number and size of the integrated coolers, the materials to be used, and the overall aesthetic of the finished product. A well-defined plan will significantly reduce errors and ensure a smoother construction process.
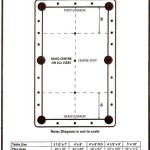
Firstly, the dimensions of the table must be decided upon. Consider the available space on the patio or deck, the intended number of users, and the desired balance between tabletop surface area and the cooler compartments. A rectangular table typically offers the most efficient use of space and ease of construction. A common size for a table that accommodates 4-6 people is approximately 6 feet long, 3 feet wide, and 30 inches high. These dimensions can be adjusted based on specific needs and preferences.
Secondly, the number and size of the coolers need careful consideration. If the table is intended primarily for beer, smaller coolers might suffice. However, if wine is also to be accommodated, larger coolers that can accommodate wine bottles standing upright should be selected. Consider using standard-sized ice buckets or insulated containers that can be easily purchased. The number of coolers should be proportional to the table size and the expected number of guests. Two to four coolers is a reasonable range for a table of the aforementioned dimensions.
Thirdly, the selection of materials is paramount. Pressure-treated lumber is recommended for outdoor applications due to its resistance to rot, insects, and moisture. Redwood or cedar are also viable options, although they tend to be more expensive. The table legs can be constructed from 4x4 lumber, while the tabletop and frame can be made from 2x6 or 2x4 lumber. The interior lining of the cooler compartments should be constructed from durable, waterproof material such as plastic sheeting or a specialized cooler liner. Stainless steel hardware is recommended to prevent rust and corrosion.
Finally, the overall aesthetic should be carefully considered. The table can be stained, painted, or left natural. A clear sealant should be applied to protect the wood from the elements. Consider adding decorative elements such as tile inlays, metal accents, or personalized engravings to enhance the table's visual appeal. A detailed sketch or CAD model can be helpful in visualizing the final product and identifying potential design flaws.
Construction Process: A Step-by-Step Guide
The construction process involves several stages, including cutting the lumber, assembling the frame, creating the cooler compartments, and applying the finishing touches. Precision and attention to detail are essential at each stage to ensure a structurally sound and aesthetically pleasing final product.
The initial step involves cutting the lumber to the precise dimensions specified in the plan. Use a circular saw, miter saw, or table saw for accurate cuts. Ensure that all cuts are square and free of splinters. Sand the edges of the lumber to remove any sharp edges and prevent injuries. Following the cut list, prepare the components for the table frame, legs, and tabletop.
Next, assemble the table frame. The frame provides the structural support for the tabletop and the cooler compartments. Use screws or bolts to join the lumber together. Predrilling pilot holes is recommended to prevent the wood from splitting. Ensure that the frame is square and level before proceeding. Reinforce the corners of the frame with metal brackets or wooden cleats for added stability. The frame should be designed to accommodate the planned cooler compartments.
Creating the cooler compartments requires careful planning and execution. Cut openings in the tabletop that are slightly larger than the coolers to allow for easy insertion and removal. Construct boxes or frames around the openings to support the coolers. Line the interior of the openings with waterproof material such as plastic sheeting or a specialized cooler liner. This will prevent water damage to the wood. Secure the liner with adhesive or staples. Ensure that the coolers fit snugly within the compartments but are easily removable for cleaning and maintenance.
After the frame and cooler compartments are assembled, attach the tabletop. The tabletop can be constructed from individual boards or a single sheet of plywood. Secure the tabletop to the frame with screws or bolts. Ensure that the tabletop is flush with the frame and that there are no gaps or uneven surfaces. Sand the tabletop smooth and fill any imperfections with wood filler. The edges of the tabletop can be rounded over with a router for a more comfortable and refined look.
The final step involves applying the finishing touches. This includes sanding the entire table, applying a stain or paint, and sealing the wood to protect it from the elements. Choose a stain or paint that complements the surrounding environment. Apply multiple coats of sealant to ensure maximum protection. Allow the sealant to dry completely before using the table. Consider adding decorative elements such as tile inlays, metal accents, or personalized engravings to enhance the table's visual appeal. Install drainage holes at the bottom of the cooler inserts to allow water from melted ice to escape.
Materials and Tools Required
The successful completion of this project necessitates the availability of appropriate materials and tools. A comprehensive list will ensure that all necessary items are on hand before the commencement of construction, minimizing interruptions and streamlining the building process.
The materials required include pressure-treated lumber (or redwood/cedar), stainless steel screws or bolts, waterproof cooler liners or plastic sheeting, wood glue, wood filler, sandpaper (various grits), stain or paint, sealant, and optional decorative elements (tile, metal, etc.). The quantity of lumber will depend on the dimensions of the table, as determined in the planning phase. Ensure that sufficient quantities of all materials are purchased to avoid shortages during construction.
The tools required include a circular saw, miter saw, or table saw, a drill with various drill bits, a screwdriver, a measuring tape, a level, a square, sandpaper and a sanding block or orbital sander, a paint brush or roller, a router (optional), and safety glasses and gloves. A workbench or sturdy work surface is also essential for supporting the lumber during cutting and assembly. A jigsaw or hole saw may be needed for cutting the openings for the coolers. Clamps are useful for holding the pieces together during gluing and screwing.
The selection and proper use of tools are crucial for the accuracy and safety of the project. Always wear safety glasses and gloves when working with power tools. Read and understand the operating instructions for each tool before use. Maintain the tools in good working condition and sharpen blades regularly. Proper tool maintenance will ensure efficient operation and prevent accidents. A well-equipped workshop will significantly enhance the quality and speed of the construction process.
By carefully following the planning and construction steps outlined above, individuals can create a functional and aesthetically pleasing patio table with built-in beer and wine coolers. This project represents a rewarding combination of woodworking skills and practical design, resulting in a valuable addition to any outdoor living space.

Diy Patio Table With Built In Beer Wine Cooler Do It Yourself Fun Ideas

Patio Table With Built In Beer Wine Coolers Pátio Diy Ideias De Quintais Mesa Cerveja

Patio Table W Built In Beer Wine Cooler Ana White

Plans For A Patio Table With Built In Beer Wine Coolers Woodwork City Free Woodworking

Patio Table With Built In Beer Wine Coolers Ana White

Patio Table W Built In Beer Wine Cooler Ana White

Patio Table With Built In Beer Wine Coolers Diy

Patio Table With Built In Beer Wine Coolers Ana White

Diy Patio Table With Built In Beer Wine Coolers

Patio Table With Built In Beer Wine Coolers Ana White