Creating Stunning Round Wood End Table Plans
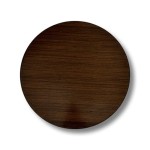
Round wood end tables exude a timeless elegance that complements diverse home décor styles. By crafting them yourself using our comprehensive plans, you can add a touch of rustic charm to your living space while showcasing your woodworking prowess.
Plan Selection
The key to a successful project begins with selecting a plan that aligns with your skill level and desired table style. Consider the following factors:
- Wood Species: Choose from premium hardwoods like oak, maple, or walnut, or opt for more affordable options such as pine or cedar.
- Complexity: Choose a plan that matches your woodworking experience, whether you're a beginner or an experienced craftsman.
- Style: Plan for a simple, classic round end table or incorporate decorative elements like carved legs or a distressed finish.
Materials and Tools
Once you have your plan, gather the necessary materials and tools for the project. Essential items include:
- Wood planks (refer to the plan for specific dimensions)
- Wood glue
- Clamps
- Sander or sandpaper
- Drill and drill bits
- Saw (circular saw, table saw, or miter saw)
- Router (optional, for decorative features)
- Stain or paint (optional, for finishing)
Plan Execution
Follow the plan instructions carefully, paying attention to the following key steps:
- Cut the Wood: Use precise measurements and sharp blades to cut the wood pieces as per the plan.
- Assemble the Base: Join the base pieces using wood glue and clamps. Ensure the joints are sturdy and aligned.
- Attach the Top: Affix the tabletop to the base using screws or wood glue. Ensure a secure and flush connection.
- Sand and Finish: Smooth out any rough edges or splinters by sanding. Apply a stain or paint finish as desired.
Tips for Success
To enhance your project outcome, consider the following tips:
- Use sharp tools to ensure clean and precise cuts.
- Dry-fit components before gluing to check for proper fit.
- Apply ample wood glue to create strong and durable joints.
- Allow adequate drying time before clamping or using the table.
- Experiment with different stain colors and finishes to customize the table.
Conclusion
Creating a round wood end table using our plans is an enjoyable and rewarding project. By following the above steps and incorporating our tips, you can craft a piece of furniture that combines beauty and functionality, adding a touch of warmth and rustic charm to your home.

Diy End Table Angela Marie Made

Diy Round Side Table Shanty 2 Chic

Benchright Round End Tables Ana White

Build A Round Side Table Basic

Simple Round Side Table Kreg Tool

Build A Round Side Table Basic

Easy Diy Round End Table

Diy End Table Angela Marie Made

More Like Home Round Coffee Tables 4 Easy To Build Styles Day 10

Diy Wood Circle Side Table Liz Marie Blog