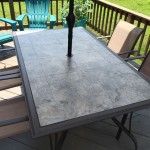
Sanding and Staining an Old Table: A Comprehensive Guide
Restoring an old table to its former glory can be a rewarding project that adds character and value to your home. Sanding and staining are key steps in this process, and they require careful attention to detail. Here's a comprehensive guide to guide you through the process:
Step 1: Preparation
Before you begin sanding, remove any hardware, legs, or other detachable parts from the table. Thoroughly clean the surface of the table to remove dirt and debris using a damp cloth. Allow the table to dry completely before proceeding.
Step 2: Sanding
Start sanding with a coarse-grit sandpaper (around 100 grit) using a power sander or by hand. Sand in the direction of the wood grain to avoid scratching the surface. Gradually move to finer grits (150, 220, and 320) until the surface is smooth and free of any imperfections.
Step 3: Cleaning
Once you've finished sanding, wipe down the table with a damp cloth to remove any dust. Allow the table to dry completely before staining.
Step 4: Staining
Choose a stain that complements the color and style of your table. Apply the stain evenly to the surface using a brush or a cloth. Allow the stain to penetrate for the recommended amount of time (usually around 15-30 minutes).
Step 5: Buffing
After the stain has penetrated, use a clean cloth to buff away any excess. This will help to even out the color and create a smooth finish.
Step 6: Sealing
To protect the stain and enhance its durability, apply a clear finish such as polyurethane or varnish. Use a brush or a sprayer to apply the finish in even, thin coats. Allow each coat to dry completely before applying the next.
Tips:
- Wear a dust mask and safety glasses when sanding.
- Use a sanding block for flat surfaces and a contour sanding tool for curved surfaces.
- Test the stain on an inconspicuous area before applying it to the entire table.
- Allow ample time for the stain and finish to dry completely to ensure optimal results.
Conclusion
With careful preparation and attention to detail, you can successfully sand and stain an old table and restore it to its former beauty. This project not only adds value to your furniture but also creates a sense of accomplishment and satisfaction. By following these steps and tips, you can achieve a professional-looking finish that will enhance the style of your home for years to come.

Dining Room Table Makeover Refinishing A Wood Veneer Stacy Risenmay

How To Refinish A Table Sand And Sisal

How To Refinish A Wood Table Easy Steps For Sanding And Refinishing

How To Restain Wood Without Stripping So Simple Artsy Rule

Cherry Table Stained Gray

How To Refinish A Dining Table Without Stripping The Original Coat

The Miracle Of Refinishing An Old Dining Table

Furniture Sanding 101 How To Sand Wood Little House Of Four Creating A Beautiful Home One Thrifty Project At Time

Stripping A Table Method For Lightening Dark Wood Furniture Joyfully Treasured

How To Refinish A Worn Out Dining Table
Related Posts