Farmhouse Table Bench Plans: A Guide Inspired by Ana White
Farmhouse style furniture has surged in popularity, offering a blend of rustic charm and modern comfort. A key element in many farmhouse dining setups is the farmhouse table bench. These benches provide flexible seating, often accommodating more people than individual chairs while contributing to the overall aesthetic. Ana White, a well-known figure in the DIY community, has popularized accessible and straightforward plans for creating farmhouse-style furniture, including benches. This article delves into the considerations, materials, and steps involved in building a farmhouse table bench, drawing inspiration from Ana White's approach to empowering DIY enthusiasts.
The essence of the Ana White philosophy is to demystify woodworking and provide clear, concise plans that anyone can follow, regardless of their prior experience. Her plans typically prioritize affordability, accessibility of materials, and ease of construction. While this article references her style and approach, it aims to provide a more comprehensive overview of the entire process, allowing for modifications and customizations based on individual needs and preferences. This includes detailed information regarding material selection, necessary tools, step-by-step construction guidance, and various finishing techniques.
Understanding the Design and Materials
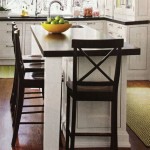
Before embarking on the construction of a farmhouse table bench, a thorough understanding of the design and the selection of appropriate materials is paramount. The fundamental design of a farmhouse bench usually includes a flat seat surface supported by a sturdy base. The base often features legs that are angled for added stability and visual appeal, commonly connected by stretchers or aprons. The simplicity of this design allows for significant customization, allowing the builder to tailor the bench to match their existing table and overall home décor.
The selection of wood is a critical factor in determining the durability and aesthetic appeal of the bench. Softwoods, such as pine and fir, are often chosen for their affordability and ease of workability. However, they are more prone to dents and scratches. Hardwoods, like maple, oak, and poplar, offer superior durability and a finer grain pattern but come at a higher cost and require more specialized tools. When selecting wood, it is essential to consider the moisture content. Kiln-dried lumber is recommended to minimize warping and cracking after construction.
Beyond the primary wood selection, other materials are required for joinery and finishing. Wood glue is essential for creating strong and durable joints. Screws or nails are used to reinforce these joints, providing added stability. Sandpaper in various grits is necessary for smoothing surfaces and preparing the wood for finishing. Finally, the choice of finish, such as stain, paint, or varnish, will dictate the final appearance and protective qualities of the bench.
Step-by-Step Construction Process
The construction process can be broken down into several key steps: cutting the wood to size, assembling the base, attaching the seat, and finishing the bench. Accurate measurements and precise cuts are crucial for ensuring a level and sturdy bench.
Cutting the Wood: Refer to the chosen plans or design for the specific dimensions of each component, including the legs, seat, stretchers, and aprons (if applicable). Use a miter saw or circular saw to cut the wood to the required lengths. Ensure that all cuts are square and accurate. A table saw can be helpful for ripping wider boards to the desired width. If using a hand saw, take extra care to maintain a straight and consistent cut.
Assembling the Base: The base typically consists of the legs and stretchers. The stretchers provide structural support and prevent the legs from splaying outwards. Connect the legs to the stretchers using wood glue and screws or nails. For a stronger joint, consider using mortise and tenon joints, although this requires more advanced woodworking skills. Ensure that the legs are perpendicular to the stretchers to prevent wobbling. Clamping the pieces together while the glue dries will ensure a tight and secure bond. If using angled legs, ensure that the angle is consistent across all four legs.
Attaching the Seat: Once the base is assembled, attach the seat to the top of the base. Position the seat centrally over the base, ensuring that there is an even overhang on all sides (if desired). Use wood glue and screws to secure the seat to the base. Screws should be countersunk to prevent them from protruding above the surface of the seat. Consider using pocket hole joinery to attach the seat from underneath, concealing the screw holes and creating a cleaner appearance.
Finishing the Bench: After the bench is fully assembled, it is time to sand and finish the wood. Start with a coarse grit sandpaper (e.g., 80-grit) to remove any imperfections and smooth the surface. Gradually increase the grit to finer grades (e.g., 120-grit, 220-grit) to achieve a smooth and polished finish. Remove all dust with a tack cloth before applying the finish. The choice of finish will depend on the desired aesthetic and level of protection. Stain can be used to enhance the wood grain and add color. Paint provides a solid, opaque finish. Varnish or polyurethane protects the wood from moisture and scratches. Apply multiple coats of finish, allowing each coat to dry completely before applying the next. Lightly sand between coats to ensure a smooth and even finish.
Customization and Design Considerations
While following a specific plan like those popularized by Ana White provides a solid foundation, the real beauty of DIY projects lies in the ability to customize and adapt the design to suit individual needs and preferences. Several aspects of the farmhouse table bench can be modified to create a unique piece of furniture.
Size and Dimensions: The overall size of the bench can be adjusted to match the dimensions of the table and the available space. The seat height should be comfortable for seating at the table, typically around 18 inches. The length of the bench should be slightly shorter than the table to allow for easy access and movement. The width of the seat can also be adjusted to accommodate multiple people or to create a more spacious seating area.
Leg Design: The design of the legs significantly impacts the overall aesthetic of the bench. Straight legs offer a classic and simple look, while angled legs add a touch of visual interest and stability. Tapered legs provide a more refined and elegant appearance. Different types of wood can also be used for the legs to create a contrasting effect. Metal legs can be incorporated for a more industrial look.
Seat Design: The seat can be a single solid piece of wood or composed of multiple planks. Using multiple planks can create a more rustic and farmhouse-inspired look. The edges of the seat can be rounded over for added comfort and to prevent sharp edges. The seat can also be upholstered with fabric or leather for a more luxurious and comfortable seating experience. A built-in storage compartment can be added underneath the seat to provide additional functionality.
Finishing Techniques: The finishing technique can dramatically alter the appearance of the bench. Distressed finishes, characterized by intentional imperfections and worn-out areas, can enhance the rustic and farmhouse aesthetic. Milk paint offers a unique and antique look. Applying a clear coat of wax can enhance the durability and sheen of the finish. Experimenting with different stains and paints can create a personalized and eye-catching piece.
Building a farmhouse table bench, whether directly following plans inspired by Ana White or incorporating individual modifications, represents a rewarding DIY project. The process encompasses careful planning, precise execution, and creative freedom. The resulting bench offers not only functional seating but also a tangible expression of personal craftsmanship and style, seamlessly integrating into a farmhouse-themed dining area.

Beginner Farm Table Benches 2 Tools 20 In Lumber Ana White

Triple Pedestal Farmhouse Bench Ana White

Farmhouse Table Bench Ana White

Farmhouse Bench No Pocket Holes Version Ana White

Modern Farm Table Ana White

4x4 Truss Benches Ana White

Fancy X Farmhouse Bench Ana White

2x4 Truss Style Farm Bench Ana White

2x4 Truss Style Farm Bench Ana White

4x4 Truss Benches Ana White