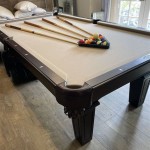
Build Your Own Ping-Pong Paradise: A Comprehensive Guide
Table tennis, also known as ping-pong, is a beloved game that brings joy to people of all ages. If you're a ping-pong enthusiast looking to create your own dedicated playing space, constructing your own table is an exciting and rewarding endeavor. Here's a detailed guide to help you build a durable and professional-quality ping-pong table from scratch.
Materials and Tools You'll Need
Materials:
- 1 sheet of 3/4-inch plywood (48" x 96")
- 1 piece of 1/4-inch plywood (48" x 96")
- 1 quart of wood glue
- 1/2-inch wood screws
- 4 ping-pong net posts
- 1 ping-pong net
- Circular saw or table saw
- Drill
- Clamps
- Sandpaper
- Measuring tape or ruler
- Level
Step 1: Cutting and Assembling the Table Base
Cut the 3/4-inch plywood sheet to 48" x 96" for the table top. Cut two pieces of 1/4-inch plywood to 48" x 24" for the sides, and two pieces to 96" x 24" for the ends. Join the sides and ends to the table top using wood glue and screws, forming a rectangular frame.
Step 2: Installing the Tabletop
Place the 1/4-inch plywood sheet on top of the frame and align it evenly. Secure it with wood glue and screws, making sure it's flush with the edges of the frame. Allow the glue to dry completely.
Step 3: Smoothing and Finishing
Sand the table surface and edges to remove any splinters or rough spots. Apply a thin layer of wood filler to any gaps or imperfections, and sand again to create a smooth finish. If desired, you can paint or stain the table to match your décor.
Step 4: Installing the Net Posts
Drill holes in the table edges where the net posts will be installed. Insert the posts into the holes and secure them with wood glue and screws. Make sure the posts are level and at the proper height for regulation play.
Step 5: Attaching the Net
Stretch the ping-pong net over the posts. Use the net's built-in clips or hooks to attach it securely. Ensure that the net hangs evenly and is at the correct playing height.
Tips for a Durable Table
Use high-quality plywood for the table base and top. Apply multiple layers of wood glue for a strong bond. Reinforce the corners and edges with additional screws or brackets. Seal the table with a protective coating to prevent warping or damage. Store the table in a dry and well-ventilated area when not in use.
Conclusion
Building your own ping-pong table top is a satisfying project that can save you money and provide years of enjoyment. By following these steps and using the recommended materials and tools, you can create a table that meets professional standards and enhances your ping-pong experience.

How To Make A Diy Folding Ping Pong Table Half The Cost Of Bought

How I Made A Ping Pong Table The First Piece For My Game Room

Diy Ping Pong Table The Idea Room

How To Build A Ping Pong Table 9 Steps Instructables

How To Make A Ping Pong Table Top For Pool

Outdoor Ping Pong Table Kreg Tool

10 Tips For Building An Outdoor Ping Pong Table Using Cement Board A Pretty Happy Home

Our Diy Ping Pong Table For Indoors How To Posimagine

Outdoor Ping Pong Table Kreg Tool

The Easiest Leather Ping Pong Net Tutorial Pine And Poplar

