How to Make an Adjustable Table Top
An adjustable table top offers versatility and ergonomic benefits, allowing users to customize the height of their workspace to suit various tasks and postures. Constructing one involves careful planning, material selection, and precise execution. This article provides a comprehensive guide on how to build an adjustable table top, suitable for both DIY enthusiasts and experienced woodworkers.
Planning and Design Considerations
The first step in building an adjustable table top is meticulous planning. This phase involves determining the desired dimensions, the type of adjustment mechanism, and the overall aesthetic of the final product. Consider the intended use of the table. Will it be used for a home office, a workshop, or a craft area? The answer will influence the size and weight capacity requirements.
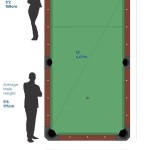
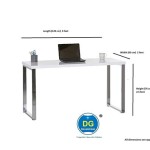
Dimensions are crucial. Measure the available space and factor in any constraints like doorways or existing furniture. Consider the number of monitors or other equipment that will be placed on the table. A larger surface area provides more workspace, while a smaller table is more suitable for compact environments. The typical height range for an adjustable desk is 25 to 50 inches, allowing for comfortable use while sitting or standing. Calculate the minimum and maximum dimensions appropriate for the user.
The choice of adjustment mechanism is a critical factor. Electric standing desk frames are a popular option, offering push-button height adjustment. These are commercially available and come in various sizes and weight capacities. Alternatively, manual crank mechanisms provide a more budget-friendly and eco-conscious option. Another option is a system of legs with adjustable height settings, often using pins or locking mechanisms. Each option has its trade-offs in terms of cost, ease of use, and reliability. Selecting the right mechanism before constructing the table top ensures compatibility and ease of integration.
The aesthetic design should complement the surrounding environment. Consider the style of existing furniture and the overall décor of the room. Will the table top be modern and minimalist, or more traditional? This will influence the choice of materials and finishes. Sketches and CAD drawings can be helpful in visualizing the final product and refining the design.
Safety considerations are paramount. Ensure that the design incorporates stability and prevents tipping, especially at the highest height setting. Proper weight distribution is crucial, and it’s important to adhere to the weight capacity limitations of the chosen adjustment mechanism. Consider adding features like cable management systems to minimize hazards and maintain a clean workspace.
Material Selection and Preparation
Choosing the right materials is essential for the durability, stability, and aesthetic appeal of the adjustable table top. The most common materials are wood, laminate, and solid surface materials. Each has its own advantages and disadvantages.
Wood is a popular choice due to its natural beauty and versatility. Solid wood offers exceptional strength and can be finished in a variety of ways. However, it is more expensive and can be susceptible to warping or cracking if not properly seasoned and sealed. Hardwoods like maple, oak, and walnut are excellent choices for table tops, providing both durability and aesthetic appeal. Softwoods like pine are more affordable but less resistant to scratches and dents.
Plywood and MDF (Medium Density Fiberboard) are engineered wood products that offer stability and affordability. Plywood is composed of multiple layers of wood veneer glued together, providing strength and resistance to warping. MDF is a denser material made from wood fibers and resin, offering a smooth surface for painting or laminating. These materials are often used as a substrate for veneer or laminate surfaces.
Laminate surfaces consist of a decorative layer of paper impregnated with resin, bonded to a substrate like plywood or MDF. Laminates are durable, scratch-resistant, and available in a wide range of colors and patterns. They are a cost-effective alternative to solid wood and can mimic the look of natural materials. However, laminate edges can be vulnerable to chipping and require careful edge banding.
Solid surface materials like Corian are non-porous, stain-resistant, and seamless. They are made from acrylic or polyester resins and mineral fillers, offering a smooth and hygienic surface. Solid surface materials are more expensive than wood or laminate but provide exceptional durability and longevity. They can be shaped and molded to create custom designs.
Once the materials are selected, proper preparation is crucial. Wood should be properly seasoned and dried to prevent warping or cracking. Plywood and MDF should be inspected for any defects or imperfections. Laminate sheets should be cut to size with a specialized cutter to prevent chipping. Edge banding should be applied to exposed edges to protect the core material and provide a finished look. This process typically involves using heat-activated adhesive to bond the edge banding to the core material, followed by trimming and sanding the edges flush.
For any wooden surfaces, sanding is crucial before finishing. Start with a coarser grit sandpaper (e.g., 80 grit) to remove any imperfections or rough spots, then gradually increase the grit to a finer grade (e.g., 220 grit) to create a smooth surface. Dust thoroughly after each sanding step to prevent particles from embedding in the finish.
Assembly and Finishing
The assembly process involves attaching the table top to the chosen adjustment mechanism and applying the desired finish. This requires precision and attention to detail to ensure a stable and aesthetically pleasing final product.
Attaching the table top to an electric standing desk frame usually involves pre-drilled holes in the frame and screws or bolts. Carefully align the frame with the table top and secure it according to the manufacturer's instructions. Ensure that the screws or bolts are tightened properly to prevent any wobbling or instability. If using a manual crank mechanism or adjustable legs, follow the manufacturer’s instructions for attachment. It’s important to distribute the weight evenly and ensure that the table top is securely fastened to the frame.
Before applying the finish, make sure the table top surface is completely clean and free of dust or debris. Tack cloths are helpful for removing fine particles. If using a stain, apply it evenly with a brush, sponge, or cloth, following the manufacturer's instructions. Allow the stain to penetrate the wood for the recommended time, then wipe off any excess. Multiple coats of stain may be required to achieve the desired color depth.
For a durable and protective finish, apply several coats of clear coat, such as polyurethane or lacquer. Polyurethane is a popular choice for its durability and resistance to scratches and water. Lacquer provides a smooth and glossy finish but may be less resistant to scratches. Apply the clear coat in thin, even layers, allowing each coat to dry completely before applying the next. Lightly sand between coats with fine-grit sandpaper to remove any imperfections and ensure a smooth, even finish.
For laminate or solid surface table tops, finishing may involve polishing or buffing to enhance the sheen and remove any scratches or imperfections. Follow the manufacturer’s instructions for specific polishing or buffing techniques. Edge banding should be carefully sanded and finished to match the table top surface. Consider using a specialized edge banding trimmer to ensure a clean and precise edge.
Once the finish is dry and cured, inspect the table top for any imperfections or blemishes. Touch up any areas as needed and ensure that the surface is smooth and even. Install cable management systems or other accessories to complete the final product. A well-constructed and finished adjustable table top will provide years of comfortable and productive use.

How To Make Diy Tabletop For A Standing Desk Frame Thediyplan

Making The Best Ergonomic Adjustable Sewing And Cutting Table Gwenstella Made

How To Make Your Own Adjustable Diy Desk

Make Your Own Table Top Easel From The Frugal Studio

How To Make Your Own Adjustable Diy Desk

How To Make A Super Flat Workbench Top Assembly Table Diy Torsion Box

How To Make Diy Tabletop For A Standing Desk Frame Thediyplan

How To Make Your Own Drafting Table Simply Life Design Edit

Here S How You Can Make This Super Customizable Diy Farmhouse Table

Work Better 5 Diy Standing Desk Projects You Can Make This Weekend