How to Paint an End Table
Transforming an old or tired end table with a fresh coat of paint is a simple and rewarding DIY project. It allows you to personalize your space with a pop of color or a subtle, elegant finish. Whether you're a seasoned painter or a beginner, this guide will walk you through the steps, ensuring a smooth and successful outcome.
1. Preparation is Key: Get Ready for Painting
A well-prepared surface is essential for a beautiful and durable paint job. Begin by carefully cleaning the end table, removing any dust, grime, or sticky residue with a damp cloth and mild soap. Allow it to dry completely before proceeding.
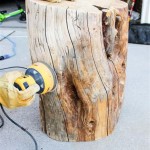
If the end table has a glossy or varnished finish, sanding is necessary to create a rough surface that allows the paint to adhere properly. Use fine-grit sandpaper (120-grit) to lightly sand the entire surface, paying particular attention to any raised areas or imperfections. Wipe away sanding dust with a damp cloth.
For heavily distressed or chipped surfaces, a primer is crucial. It helps to cover imperfections, create a smooth base, and improve paint adherence. Choose a primer compatible with your chosen paint type (latex or oil-based). Apply a thin, even coat with a brush or roller, allowing it to dry completely before moving to the next step.
2. Choosing the Right Paint and Tools
Selection of paint and tools plays a vital role in achieving the desired finish. Consider the following factors when choosing paint:
- Type: Latex paints are water-based, making them easy to clean up and offering a good balance of durability and ease of application. Oil-based paints offer a more durable finish but require mineral spirits for cleanup.
- Finish: Matte, satin, semi-gloss, and gloss finishes offer varying levels of sheen and durability. Matte finishes hide imperfections well, while gloss finishes highlight details and are more durable but show imperfections more readily.
- Color: Choose a color that complements the existing décor or adds a desired contrast. You can explore paint color swatches or online visualizers to visualize your choice.
For application, you'll need the following tools:
- Paintbrushes: Choose brushes with bristles appropriate for the paint type and desired finish. For smooth surfaces, a foam brush may be suitable, while angled brushes are ideal for corners and edges.
- Paint roller: A roller provides quick and even coverage, particularly for large surfaces. Choose a size that fits the table's dimensions comfortably.
- Paint tray: A paint tray with a liner provides a clean and convenient way to pour and apply paint.
- Drop cloths: Protect your floors and surrounding areas from paint spills and drips with drop cloths.
- Painter's tape: Use painter's tape to mask off areas you don't want to paint, ensuring clean lines.
3. Applying Paint with Precision and Care
With your paint and tools ready, you can start the painting process. Follow these steps for a smooth and even finish:
- Protect your workspace: Lay down drop cloths to protect your floors and surrounding areas. Mask off any areas you don't want to paint using painter's tape. This step ensures clean edges and prevents accidental paint spills.
- Apply the first coat: Using a brush or roller, apply a thin, even coat of paint to the end table. Start with the edges and corners, using the brush for precise application. Then move to the larger surfaces, using the roller for smooth and consistent coverage. Allow the first coat to dry completely according to the manufacturer's instructions.
- Sand lightly (optional): For a smoother finish, you can lightly sand the first coat with fine-grit sandpaper between coats. This helps to blend any imperfections and creates a smoother surface for subsequent coats. Wipe away sanding dust with a damp cloth.
- Apply additional coats: Apply additional coats of paint as needed to achieve the desired color depth and coverage. Allow each coat to dry completely before applying the next.
- Touch-up and cleanup: Once the final coat is dry, inspect the end table for any missed spots or imperfections. Use a small brush to touch up any areas that require additional paint. Remove painter's tape carefully and clean up any spills or paint splatters.
Allow the final coat of paint to cure completely before using the end table to ensure the paint is fully hardened and durable. The curing time will vary depending on the paint type and environmental conditions. With a little time and care, you'll have a beautifully painted end table that enhances your space and reflects your personal style.

Update A Side Table With Paint Confessions Of Serial Do It Yourselfer

An Easy Side Table Makeover With Fusion Mineral Paint My Family Thyme

Farmhouse End Table Makeover The Barn Wood Finish Roots Wings Furniture Llc

Easy Side Table Makeover Fun With Chalk Paint

Diy Chalk Painted End Table Her Happy Home

End Table Makeover With Milk Paint And Stain

Diy Chalk Paint End Table Tutorial Sabrinas Organizing

Diy Painted End Tables Make Something Mondays

10 Painted End Table Makeovers Green With Decor

Farmhouse End Table Makeover The Barn Wood Finish Roots Wings Furniture Llc
Related Posts


