How To Build a Drafting Table
A drafting table is an essential piece of equipment for architects, designers, artists, and anyone who needs a large, adjustable surface for drawing and sketching. While drafting tables can be expensive to purchase, they are relatively simple to build with basic woodworking skills and readily available materials. This article will guide you through the steps of constructing your own drafting table, providing a detailed explanation of the process and the materials required.
Step 1: Design and Planning
Before starting the construction process, it is essential to carefully plan the design of your drafting table. Consider the following factors:
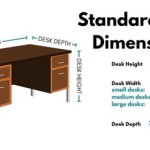
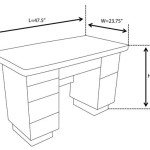
- Size: Determine the desired dimensions of the table, taking into account the space available and the types of projects you intend to work on.
- Height: Choose a comfortable working height, which can be adjusted to your preferences. Consider using a drafting table with an adjustable height feature.
- Materials: Select materials that are durable, stable, and suitable for your intended use. Common materials include plywood, MDF, and hardwood.
- Features: Decide on any additional features, such as a drawer, shelf, or built-in storage compartments.
Once you have a clear design in mind, create a detailed blueprint or sketch that includes the dimensions of all components. This will serve as a reference during the construction process.
Step 2: Cutting and Preparing Materials
With the design finalized, gather the necessary materials, which will include:
- Wood: Plywood or MDF for the table top, legs, and bracing. Choose a thickness appropriate for the desired stability and weight support.
- Hardware: Screws, bolts, hinges, and other fasteners for assembling the table. Choose heavy-duty components for durability.
- Finishing materials: Stain, paint, or varnish for protecting and enhancing the appearance of the table.
- Tools: Saw, drill, screwdriver, sander, measuring tape, level, and other woodworking tools.
Using the blueprint as a guide, carefully cut the wood components to size using your chosen tools. Ensure accurate measurements and straight cuts for a professional finish. Sand the edges and surfaces of all pieces to remove any rough edges or imperfections. If desired, apply a protective finish such as stain, paint, or varnish to the wood.
Step 3: Assembling the Table
Now comes the crucial part: assembling the table according to your design. The specific procedure depends on your chosen design, but some general principles apply:
- Start with the base: Assemble the legs and supporting braces first, ensuring they are square and stable. Use strong wood glue and appropriate fasteners for a secure connection.
- Attach the tabletop: Next, attach the tabletop to the base, making sure it is level and aligned correctly. Use heavy-duty screws or bolts for a strong bond.
- Add any additional features: If your design includes a drawer, shelf, or other components, assemble and attach them to the table at this stage.
- Test and adjust: Once the table is fully assembled, test its stability and adjust any components as needed to ensure proper alignment and functionality.
Step 4: Final Touches
Once the drafting table is assembled, you can complete the final touches, such as:
- Sanding and finishing: Sand any rough edges and imperfections to achieve a smooth and professional finish. Apply a final coat of stain, paint, or varnish for protection and aesthetic appeal.
- Cleaning and maintenance: Clean the table thoroughly with a damp cloth to remove any sawdust or dust. Follow the manufacturer's instructions for cleaning and maintaining the finish.
- Add accessories: Consider adding essential accessories like a T-square, drafting tools, and storage containers to enhance your drafting experience.
By following these steps and using high-quality materials, you can build a sturdy and functional drafting table that will serve you for years to come. Remember to prioritize safety, accuracy, and attention to detail throughout the construction process.

How To Build A Drafting Table

How To Build A Drafting Table

Make A Wood Drafting Table The Architect S Part Ten

How Can I Build An Antique Style Drafting Table Desk Hometalk

Drafting Table Plans Free Blueprint Architect Wood

Drafting Table Made From Plywood 4 Steps With S Instructables

Diy Drafting Table Built With Kee Klamp Simplified Building

How To Build A Wall Mounted Drawing Drafting And Writing Desk Buildeazy

Diy Drafting Table Built With Kee Klamp Simplified Building

Diy Drafting Table Built With Kee Klamp Simplified Building
Related Posts