How to Make a Small Table
Small tables can be a versatile addition to any home, offering a convenient surface for working, dining, or simply displaying decorative items. Whether you're looking to add extra seating to a small space, create a dedicated work area, or simply need a stylish accent piece, building your own table can be a rewarding and cost-effective project.
This guide will provide you with a comprehensive understanding of the essential steps involved in crafting a small table, from selecting the right materials to assembling the finished product. With a little patience and the right tools, you can create a unique and functional piece of furniture that complements your personal style.
Choosing the Right Materials
The first step in making a small table is selecting the appropriate materials. The type of wood you choose will dictate the overall look and feel of your table, while the hardware will ensure its stability and functionality.
For the tabletop, consider using solid hardwood such as oak, maple, or cherry. These woods are durable and resistant to scratches and dents. You can also use plywood for a more affordable option, but it may not be as robust. For the legs, you have several choices, including pre-made legs, wooden dowels, or even metal pipes.
When selecting hardware, opt for sturdy and reliable components. For example, consider using high-quality screws, brackets, and glue to ensure the table is well-constructed and secure.
Building the Tabletop
Once you've gathered your materials, you can start building the tabletop. If you're using solid wood, you'll need to cut the boards to the desired size and shape. Use a circular saw or a table saw for accurate cuts. If using plywood, cut the sheet to the size you need.
After cutting the tabletop, sand it smooth to create a consistent surface. Use a coarse-grit sandpaper to remove any rough edges and a fine-grit sandpaper for a smooth finish. Consider applying a wood stain or paint to enhance the appearance of the tabletop and protect it from wear and tear.
Assembling the Legs
The next step is to assemble the legs. If using pre-made legs, simply attach them to the tabletop using screws or brackets. If using wooden dowels, you'll need to drill holes in the tabletop and legs to accommodate the dowels. Secure the dowels with glue and let them dry completely.
If using metal pipes, cut the pipes to the desired length and attach them to the tabletop using metal brackets or flanges. Ensure the legs are evenly spaced and securely attached for stability.
Finishing Touches
Once the tabletop and legs are assembled, apply a finishing coat to protect the wood. You can use a clear polyurethane varnish, a stain, or a paint to achieve the desired effect. Allow the finish to dry completely before using the table.
Consider adding some decorative elements to your table, such as a shelf, drawer, or a custom tabletop design. These additions can enhance the functionality and aesthetics of your small table.
Safety Tips
When working with power tools, always wear safety glasses and ear protection. Be careful when using sharp tools and always follow the manufacturer's instructions for the tools you are using.
Ensure adequate ventilation when working with wood stains, paints, and finishes. Avoid using flammable materials near open flames or heat sources. Always consult with safety guidelines and information provided by the manufacturers of the materials you are using.

Build A Small Table

How To Make A Small End Table From Reclaimed Wood

How To Build A Small Table Howtospecialist Step By Diy Plans

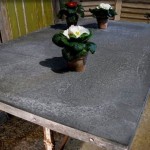
Making A Patio Side Table Diy Woodworking Simple

Simple Table Build My Repurposed Life

Build A Diy Side Table Basic

Build A Diy Side Table Basic

Preston Nesting Side Tables Ana White

How To Make A Coffee Table 15 Steps With S Wikihow

Build Stain And Seal A Side Table In Less Than One Hour

