DIY Laundry Room Table: Maximizing Space and Functionality
The laundry room, often a compact and utilitarian space, can significantly benefit from strategic organization. A DIY laundry room table offers a versatile solution for improving workflow, increasing storage, and enhancing the overall aesthetics of this essential area. This article provides a comprehensive guide to constructing a functional and stylish laundry room table, focusing on design considerations, material selection, step-by-step instructions, and advanced customization options.
Key Point 1: Design and Planning Considerations for a DIY Laundry Room Table
Before commencing construction, meticulous planning is crucial for achieving optimal functionality and integration within the existing laundry room layout. This stage involves careful consideration of several factors, including available space, desired functionality, aesthetic preferences, and budget constraints.
Space Assessment: The initial step involves accurately measuring the available space within the laundry room. This includes the length, width, and height of the designated area for the table. Careful attention should be given to obstructions such as plumbing fixtures, electrical outlets, and doorways. Creating a scaled drawing of the laundry room layout, incorporating existing appliances and fixtures, provides a visual representation for determining the ideal table dimensions.
Functionality Requirements: Determining the primary functions of the laundry room table is essential for guiding the design process. Common uses include folding laundry, sorting clothes, ironing, storing laundry supplies, and providing a surface for small mending tasks. If folding laundry is a primary function, a larger tabletop surface area is necessary. If storage is a priority, incorporating shelves, drawers, or cabinets beneath the tabletop will maximize space utilization. Considering secondary functions, such as a space for a sewing machine or a drying rack, can further enhance the table's versatility.
Aesthetic Integration: The laundry room table should complement the existing decor and style of the room. Consider the color scheme, materials, and hardware used throughout the laundry room. For a modern aesthetic, clean lines, minimalist designs, and neutral colors are appropriate. For a more rustic or farmhouse style, reclaimed wood, distressed finishes, and vintage hardware can be incorporated. Selecting materials and finishes that are both durable and aesthetically pleasing is paramount.
Budget Allocation: Establishing a realistic budget is critical for guiding material selection and design choices. The cost of materials, including lumber, hardware, paint, and finishing supplies, should be carefully estimated. Labor costs should also be factored in, particularly if any specialized tools or skills are required. Exploring options for sourcing materials at discounted prices, such as purchasing lumber from local suppliers or utilizing reclaimed materials, can help minimize project expenses.
Key Point 2: Step-by-Step Construction of a Basic Laundry Room Table
The following steps outline the construction of a basic laundry room table, assuming a rectangular design with four legs and a solid tabletop. This design can be adapted and customized to suit individual needs and preferences.
Materials List: * Four wooden legs (pre-made or custom-cut) * Lumber for the tabletop (plywood, solid wood, or reclaimed wood) * Lumber for the table frame (apron) * Wood screws * Wood glue * Sandpaper (various grits) * Primer * Paint or stain * Polyurethane or other sealant * Wood filler (optional)
Tools Required: * Measuring tape * Pencil * Saw (circular saw, miter saw, or hand saw) * Drill with screw driving bits * Sander * Clamps * Level * Safety glasses * Dust mask
Step 1: Cutting the Lumber: Using the measurements determined during the planning phase, cut the lumber for the tabletop and table frame (apron). Ensure that all cuts are precise and square for a professional finish. If using plywood for the tabletop, consider adding edge banding to conceal the exposed edges.
Step 2: Assembling the Table Frame: The table frame, or apron, provides structural support for the tabletop and connects the legs. Cut the lumber for the apron into four pieces, corresponding to the length and width of the tabletop. Apply wood glue to the joints where the apron pieces meet and secure them together using wood screws. Clamps should be used to hold the pieces firmly in place while the glue dries.
Step 3: Attaching the Legs: Attach the legs to the table frame using wood glue and wood screws. Ensure that the legs are positioned flush with the corners of the frame and that they are perfectly vertical. Using corner braces can add extra stability to the leg attachments.
Step 4: Attaching the Tabletop: Position the tabletop on top of the assembled table frame. Apply wood glue to the top edges of the frame and carefully align the tabletop. Secure the tabletop to the frame using wood screws, driving them up through the frame and into the underside of the tabletop. Ensure that the screws are countersunk to prevent them from protruding above the surface of the tabletop.
Step 5: Sanding and Finishing: Once the table is fully assembled, sand all surfaces smooth using progressively finer grits of sandpaper. Fill any gaps or imperfections with wood filler. Apply a coat of primer to the entire table and allow it to dry completely. Apply the desired paint or stain, following the manufacturer's instructions. Once the paint or stain is dry, apply several coats of polyurethane or other sealant to protect the surface from moisture and wear.
Key Point 3: Advanced Customization and Storage Options
Beyond the basic construction of a laundry room table, numerous customization options exist to enhance its functionality and storage capacity. These modifications can significantly improve the organization and efficiency of the laundry room.
Shelving Integration: Adding shelves beneath the tabletop provides valuable storage space for laundry supplies, cleaning products, and other essentials. Shelves can be open or enclosed with doors or drawers. Adjustable shelves offer flexibility for accommodating items of varying sizes. Consider using wire shelving for improved ventilation and visibility.
Drawer Installation: Incorporating drawers into the laundry room table provides concealed storage for smaller items, such as detergents, dryer sheets, and stain removers. Drawers can be constructed from lumber or purchased pre-made. Installing drawer slides ensures smooth and effortless operation. Adding drawer pulls or knobs enhances the aesthetic appeal and functionality.
Folding Ironing Board: Integrating a folding ironing board into the laundry room table is a space-saving solution for ironing clothes. A wall-mounted ironing board can be attached to the side of the table and folded down when needed. Alternatively, a built-in ironing board can be concealed within a drawer or cabinet.
Rolling Cart Integration: Adding casters to the legs of the laundry room table transforms it into a mobile workstation. This allows for easy repositioning of the table within the laundry room or even moving it to other areas of the home. Locking casters provide stability when the table is in use.
Hanging Rod Installation: Attaching a hanging rod to the underside of the tabletop creates a convenient space for hanging clothes to dry. The hanging rod can be made from metal pipe or wooden dowel. This feature is particularly useful for delicate items that should not be placed in the dryer.
Countertop Material Selection: While wood is a common material for laundry room tables, other countertop options, such as laminate, granite, or quartz, offer enhanced durability and stain resistance. Laminate countertops are an affordable and practical choice for high-traffic areas. Granite and quartz countertops provide a more luxurious and durable surface.
Incorporating a Sink: Integrating a small sink into the laundry room table adds functionality for pre-treating stains and hand-washing delicate items. This requires plumbing modifications and careful consideration of drainage and water supply lines.
Lighting Enhancements: Installing under-cabinet lighting beneath the tabletop provides task lighting for folding laundry and performing other tasks. LED strip lights are an energy-efficient and easy-to-install option. This enhances visibility and improves the overall functionality of the laundry room.
By carefully considering the design, construction, and customization options outlined in this article, individuals can create a DIY laundry room table that maximizes space, enhances functionality, and improves the overall organization of their laundry area. The project provides a cost-effective and personalized solution for transforming a utilitarian space into a more efficient and enjoyable environment.

Diy An Oversized Table For The Laundry Room Under 100 Major Hoff Takes A Wife
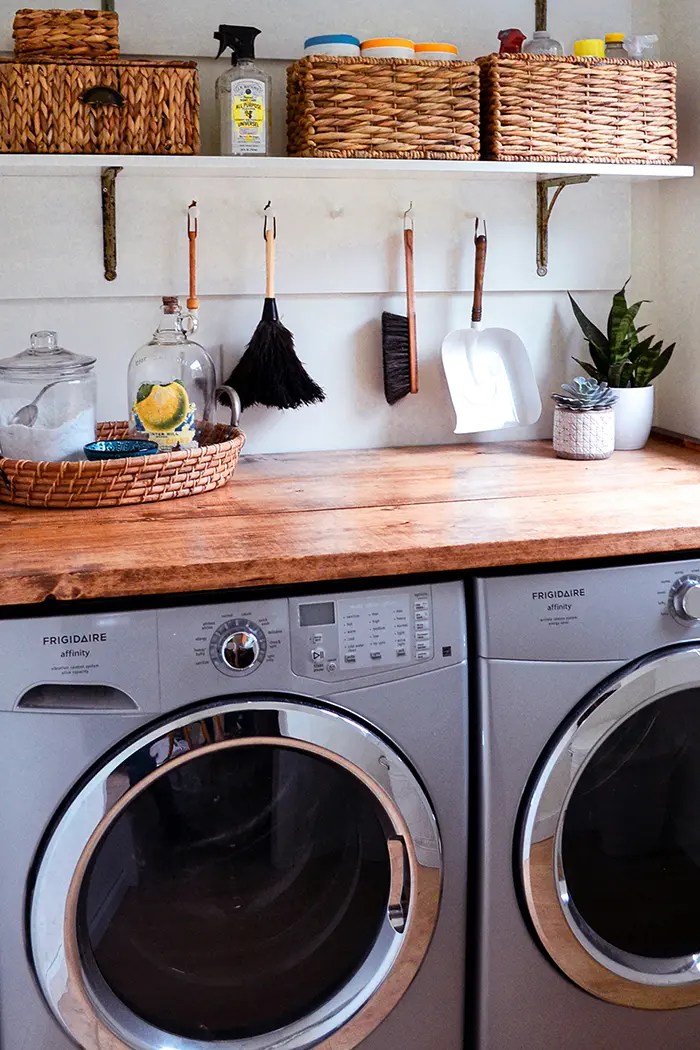
Easy Diy Wood Laundry Room Countertop For Folding

Laundry Room Renovation Folding Table Installation Citygirl Meets Farmboy

Laundry Folding Table Room Diy Design Baskets

Diy Drop Down Laundry Table Creative Housewives

Diy An Oversized Table For The Laundry Room Under 100 Major Hoff Takes A Wife

The Perfect Diy Laundry Folding Table Twelve On Main

The Perfect Diy Laundry Folding Table Twelve On Main

Laundry Room Redo Diy Folding Table Little Vintage Cottage

Easy Diy Laundry Table Over Washer And Dryer Build Steps Abbotts At Home

