Creating a Distinctive DIY Lift-Top End Table for Functional and Stylish Living
Transforming your living space with a captivating DIY lift-top end table is a rewarding endeavor that combines style and functionality. Whether you're an experienced DIY enthusiast or a novice seeking a creative project, this comprehensive guide will equip you with essential tips to craft a one-of-a-kind piece that elevates your decor.
Materials and Tools: Gathering the Essentials
Before embarking on your project, it's crucial to gather the necessary materials and tools. The core components for your lift-top end table include:
- Solid wood planks (e.g., pine, oak, or cherry)
- Plywood for the tabletop and base
- Hardware (e.g., hinges, screws, brackets)
- Wood glue
- Finish (e.g., stain, paint, varnish)
In terms of tools, you'll need:
- Circular saw or miter saw
- Drill
- Screwdriver
- Clamps
- Sandpaper or sanding block
Crafting the Base: Stability and Support
The base of your lift-top end table provides the foundation for everything above it. To create a sturdy base, follow these steps:
- Cut four pieces of plywood to the desired length and width for the sides.
- Assemble the sides using wood glue and screws.
- Create the bottom of the base by cutting a piece of plywood to fit snugly inside the frame.
- Attach the bottom to the sides.
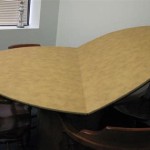
Assembling the Top: Durability and Style
The tabletop consists of two parts: the fixed portion and the lift-top. Here's how to assemble them:
- Cut the fixed portion of the tabletop from solid wood or plywood.
- For the lift-top, cut two identical pieces of plywood.
- Attach one piece of plywood to the bottom of the fixed portion using hinges.
- Install brackets or stays to support the lift-top when it's raised.
Finishing Touches: Personalizing Your Table
Now it's time to add the finishing touches that make your table uniquely yours:
- Sand the table thoroughly to remove any imperfections.
- Apply your preferred stain, paint, or varnish to enhance the wood's beauty.
- Add handles or knobs to the lift-top for easy access.
- Place your new lift-top end table in its desired spot and enjoy its functionality and style.
Tips for a Seamless DIY Project
To ensure your DIY lift-top end table project is a success, consider these tips:
- Use high-quality wood and hardware for durability.
- Measure and cut precisely for a proper fit.
- Pre-drill holes for screws to prevent splitting.
- Allow ample time for the glue to dry completely.
- Sand thoroughly to achieve a smooth finish.

Diy Lift Top Coffee Table Step By Instructions Chisel Fork

Diy Lift Top Coffee Table Step By Instructions Chisel Fork

Diy Lift Top Coffee Table Step By Instructions Chisel Fork

Diy Lift Top Coffee Table Step By Instructions Chisel Fork

Lift Top Coffee Table With Storage Copper Pipe Base How To Woodworking

Shaker Lift Top Couch End Table Cabinet With Extending Surface Made From Solid Wood Drawer And Storage Handmade In Usa Diy Furniture Transforming

Lift Top Coffee Table With Storage Copper Pipe Base How To Woodworking

Diy Lift Top Coffee Table Step By Instructions Chisel Fork

Diy Lift Top Coffee Table Step By Instructions Chisel Fork

Lift Top Coffee Table With Storage Copper Pipe Base How To Woodworking