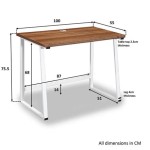
How to Build a Simple Table Saw Stand
Building a simple table saw stand can be a great way to add functionality and versatility to your workshop. With the right materials and a little bit of time, you can create a stand that is both sturdy and portable.
The first step is to gather your materials. You will need the following:
- 2x4 lumber
- 3/4-inch plywood
- 1/2-inch bolts
- 1/2-inch washers
- 1/2-inch nuts
- Wood screws
- Wood glue
- Circular saw
- Drill
- Screwdriver
- Measuring tape
- Level
Once you have your materials, you can begin building the stand. Start by cutting the 2x4 lumber to the following lengths:
- 4 pieces at 24 inches
- 4 pieces at 18 inches
Next, assemble the frame of the stand using the 24-inch pieces. Join the pieces together using wood glue and wood screws. Make sure to square the frame before you tighten the screws.
Once the frame is assembled, you can attach the plywood top. Cut the plywood to a size that is slightly smaller than the frame. Center the plywood on the frame and attach it using wood screws.
Finally, you can add the casters to the stand. This will make it easy to move the stand around your workshop. To attach the casters, simply drill holes in the bottom of the frame and insert the casters.
Your simple table saw stand is now complete. Congratulations!

Table Saw Stand Overalls Power Saws

Diy Rolling Side Table Saw Stand

Diy Table Saw Stand With Folding Outfeed Plans And

Diy Table Saw Stand With Plans The Handyman S Daughter

Building Plans For A Table Saw Stand

Awesome Rolling Table Saw Cart Diy How To Build

Table Saw Stand

Diy Portable Table Saw Stand Plans

How To Build A Miter Saw Table Diy Family Handyman

Diy Rolling Foldable Table Saw Stand Pt 1 Paoson Woodworking