How to Build a Sturdy and Stylish Table Base
Crafting a table base from scratch can be an exciting and rewarding project, adding a touch of personalization to your furniture. Whether you're a seasoned DIYer or a beginner looking to embark on a new challenge, this guide will provide you with the essential steps to build a solid and aesthetically pleasing table base.
Materials and Tools
Before you begin, gather the following materials and tools:
- Timber of your choice (hardwoods like oak or maple are recommended)
- Wood screws or bolts
- Wood glue
- Measuring tape
- Carpenter's square
- Drill
- Countersink bit
- Clamps
- Sandpaper or sanding block
- Finish of your choice (stain, paint, or varnish)
Step 1: Design and Measurements
Start by determining the size and shape of your table base. Sketch out your design and take careful measurements to ensure all the pieces fit together properly. Consider the height, length, and width of the table you plan to place on the base.
Step 2: Cut the Legs
Cut the legs for your table base according to your design. Use a precision saw for clean cuts. If your legs are tapered or have intricate shapes, consider using a band saw or router for a more accurate finish.
Step 3: Join the Legs
To join the legs, you can use either wood screws or bolts. Predrill holes slightly smaller than the diameter of the screw or bolt to avoid splitting the wood. Countersink the holes so the screw heads are flush with the surface of the wood. Apply wood glue to the joints for added strength.
Step 4: Stabilize the Base
For added stability, consider adding cross-beams between the legs. Cut the cross-beams to the appropriate length and join them to the legs using the same technique as for the legs. You may also want to add diagonal braces for even greater support.
Step 5: Finishing Touches
Once the table base is assembled, sand it thoroughly to remove any rough edges or splinters. You can then apply your desired finish, such as stain, paint, or varnish. Allow the finish to dry completely before attaching the table top.
Tips:
- Use high-quality materials and hardware for durability.
- Pay attention to the grain direction of the wood for maximum strength.
- Test-fit the pieces before gluing or screwing them together.
- Use a level to ensure that the base is stable before attaching the table top.
- Consider adding decorative elements, such as carvings or moldings, to personalize your table base.

Farmhouse Table Frame Build Series 1 Of 5 With Ina Leg Company Legs

Farmhouse Table Diy Legs

How To Build A Farmhouse Table

How To Build A Farmhouse Dining Table Green With Decor

How To Make A Diy Dining Table Set Lowe S

How To Build A Farmhouse Table

How To Build A Table With Concrete Top Diy Outdoor

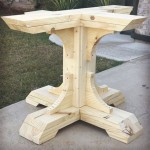
Pedestal Table Base Build Round Part 1

How To Build A Counter Height Table Sunshine And Rainy Days

Learn How To Build A Simple Table Easy Step By Tutorial