How To Build An Outdoor Table
Constructing an outdoor table is a rewarding project that enhances any outdoor living space. From dining al fresco to providing a surface for outdoor activities, a well-built table can be both functional and aesthetically pleasing. The following provides a comprehensive guide on building a durable and attractive outdoor table suitable for various purposes.
Planning and Design Considerations
Before commencing construction, careful planning and design are essential. This stage involves assessing the intended use of the table, determining the desired dimensions, and selecting appropriate materials. The type of table – dining, coffee, or side table – will significantly influence the design and dimensions.
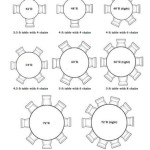
The size of the table should be proportional to the available space and the number of individuals it is intended to accommodate. For a dining table, consider a width that allows sufficient space for place settings and serving dishes. Length should be determined by the number of diners expected. For coffee or side tables, dimensions should be appropriate for the intended function, such as holding drinks, books, or decorative items.
Material selection is critical for outdoor furniture due to exposure to the elements. Wood is a common choice, offering a natural aesthetic and ease of workability. However, not all wood species are suitable for outdoor use. Options resistant to rot and insect infestation include cedar, redwood, teak, and pressure-treated lumber. Consider the aesthetic appeal and durability when selecting the wood for the table. Each wood type offers distinct characteristics and weathering properties to consider.
The design should also incorporate structural considerations to ensure stability and longevity. This includes selecting appropriate joinery methods, such as mortise and tenon, dowels, or screws and glue, and ensuring adequate support for the tabletop. The overall design must account for potential expansion and contraction of the wood due to changes in temperature and humidity.
A design blueprint or detailed sketch is helpful to visualize the project and to serve as a reference during construction. This blueprint should include precise measurements, material lists, and notes on construction techniques.
Materials and Tools
The successful construction of an outdoor table relies on the appropriate selection of materials and tools. A comprehensive checklist ensures all necessary items are readily available before commencing the project. This will minimize interruptions and streamline the building process.
The primary material is lumber, selected based on the design and durability requirements. The amount of lumber will depend on the table’s dimensions and design complexity. Ensure the lumber is straight, free of significant knots, and properly seasoned to minimize warping or cracking. Consider purchasing extra lumber to account for potential errors or design modifications.
Fasteners are crucial for securely joining the table components. Stainless steel screws are recommended for outdoor use due to their resistance to rust and corrosion. The length and type of screws should be appropriate for the thickness of the lumber being joined. Wood glue, specifically designed for outdoor use, can further enhance the strength and durability of the joints. Dowels or other joinery aids may be required depending on the chosen joinery methods.
Finishing materials are essential for protecting the wood from weathering and enhancing its aesthetic appeal. Options include exterior-grade paints, stains, and sealants. Select a finish that complements the wood species and provides adequate protection against moisture, UV radiation, and mildew. Always follow the manufacturer’s instructions for application and drying times.
Essential tools include a measuring tape, saw (circular saw, miter saw, or hand saw), drill, screwdriver, sander, and clamps. A level is necessary to ensure the table is level and stable. Safety equipment, such as safety glasses, ear protection, and gloves, is crucial for protecting oneself from potential hazards during the construction process. A workbench or stable work surface provides a convenient and safe area for cutting, assembling, and finishing the table.
Construction Steps
The construction phase involves cutting, assembling, and finishing the table according to the design blueprint. Accuracy and attention to detail are paramount to achieving a structurally sound and aesthetically pleasing outcome. Each step should be executed with precision and careful consideration.
The first step involves cutting the lumber to the specified dimensions. Use a saw appropriate for the type and thickness of the wood. Accuracy is critical during this step, as any discrepancies can affect the overall dimensions and stability of the table. Double-check all measurements before cutting and use a guide for straight, accurate cuts. Label each piece of lumber to avoid confusion during assembly.
Assembly begins with joining the legs to the apron, which is the frame that supports the tabletop. Use the selected joinery method, such as screws and glue, dowels, or mortise and tenon joints. Ensure the joints are tight and secure. Clamps can be used to hold the pieces together while the glue dries. Verify that the apron is square to the legs to maintain stability and prevent the table from wobbling.
Next, attach the tabletop to the apron. The attachment method will depend on the design and type of tabletop. Options include screws, cleats, or a combination of both. If using screws, pre-drill pilot holes to prevent splitting the wood. Ensure the tabletop is properly aligned and centered on the apron. Allow for expansion and contraction of the wood by using slotted screw holes or other methods that permit movement.
Once the table is assembled, sand all surfaces to remove any rough edges or imperfections. Start with a coarse-grit sandpaper and gradually transition to a finer grit for a smooth finish. Pay particular attention to the edges and corners, rounding them slightly for safety and comfort. Remove all sanding dust before proceeding to the finishing stage.
Apply the chosen finish to the table, following the manufacturer’s instructions. Multiple coats may be necessary to achieve the desired level of protection and aesthetic appeal. Allow each coat to dry completely before applying the next. Lightly sand between coats to remove any imperfections and ensure a smooth, even finish. Consider applying a sealant to further protect the wood from moisture and UV radiation.
Allow the finish to cure completely before using the table. This may take several days, depending on the type of finish and environmental conditions. Once cured, inspect the table for any imperfections or areas that require touch-up. The completed outdoor table is now ready to enhance the outdoor living space.

Rachel Schultz How To Build A 75 Outdoor Dining Table

How To Build An Outdoor Table Addicted 2 Diy
:max_bytes(150000):strip_icc()/cherishedbliss-2fe16e06a68b44589c6631e6b39ae68f.jpg?strip=all "18 Diy Outdoor Table Plans")
18 Diy Outdoor Table Plans

Diy Outdoor Table Angela Marie Made

Easy Diy Outdoor Coffee Table Build

Diy Outdoor Dining Table Restoration Hardware Dupe Thrifty Pineapple

Diy Outdoor Table Angela Marie Made

How To Build An Outdoor Farmhouse Table For Under 100 Woodworking Diy Project

Easy Diy Outdoor Coffee Table Build

Build Your Own X Leg Outdoor Table Honeybear Lane