How to Build a Picnic Table Bench Combo
The picnic table bench combo is a popular outdoor furniture choice, offering a convenient and comfortable space for dining, relaxation, and socializing. Building one’s own picnic table bench combo allows for customization of size, materials, and design, ensuring it perfectly complements the intended outdoor space. This article will provide a comprehensive guide to constructing a sturdy and functional picnic table bench combo, outlining the necessary materials, tools, and step-by-step instructions.
Planning and Design Considerations
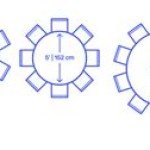
Prior to commencing the building process, careful planning is essential. The first step involves determining the desired dimensions of the picnic table bench combo. This decision should be based on the intended use and the available space. Consider the number of people who will typically be using the table, as well as the overall aesthetics of the surrounding environment. Standard picnic table dimensions are typically 6 to 8 feet in length and 2.5 to 3 feet in width. The benches are usually positioned approximately 12 to 18 inches away from the table top.
Material selection is another critical aspect of the planning phase. Pressure-treated lumber is highly recommended for outdoor applications due to its resistance to rot, decay, and insect infestation. Cedar and redwood are alternative options that offer natural durability and aesthetic appeal, albeit at a higher cost. When selecting lumber, ensure it is straight, free of knots, and of consistent thickness. Reviewing the lumber for warping or imperfections will ensure a more stable and aesthetically pleasing final product.
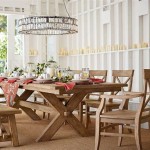
The design of the picnic table bench combo can be customized to suit individual preferences. A simple rectangular design is the most common and easiest to construct. However, variations such as round tables, tables with attached backs, or tables with built-in storage are also possible. The complexity of the design will influence the level of skill and time required for the project. Drawings or sketches can be invaluable during the planning process.
Safety considerations are also paramount. Ensure the design is stable and can withstand the anticipated weight and stresses. Avoid sharp edges or protruding hardware that could pose a hazard. When cutting and assembling the lumber, always wear appropriate safety gear, including safety glasses, gloves, and hearing protection.
Materials and Tools Required
The materials required for building a picnic table bench combo will depend on the chosen design and dimensions. However, the following is a general list of essential materials:
- Pressure-treated lumber (or cedar/redwood): The amount of lumber required will vary depending on the dimensions of the table and benches.
- Exterior-grade screws: Galvanized or stainless-steel screws are recommended for their resistance to rust and corrosion.
- Exterior-grade wood glue: This will enhance the strength and durability of the joints.
- Wood stain or sealant: This will protect the wood from the elements and enhance its appearance.
- Sandpaper: For smoothing rough edges and surfaces.
The following tools will be necessary for constructing the picnic table bench combo:
- Measuring tape: For accurate measurements.
- Pencil: For marking measurements.
- Circular saw: For cutting lumber to size.
- Drill: For pre-drilling holes and driving screws.
- Screwdriver: To drive screws. A power screwdriver or drill-driver with screwdriver bits simplifies the process.
- Level: To ensure the table and benches are level.
- Clamps: To hold the lumber in place while gluing and screwing.
- Safety glasses: To protect eyes from debris.
- Gloves: To protect hands.
- Hearing protection: To protect hearing from the noise of power tools.
Optional tools that can be helpful include a miter saw for precise angle cuts, a sander for smoothing surfaces, and a router for creating decorative edges.
Step-by-Step Construction Process
The following steps outline the construction process for a standard rectangular picnic table bench combo. Adjustments may be necessary depending on the specific design chosen.
Step 1: Cut the Lumber: Using the circular saw, cut the lumber to the required lengths according to the plan. This includes cutting the tabletop planks, bench planks, legs, support braces, and any other components as per the chosen design. Accuracy in cutting is crucial for a well-constructed table.
Step 2: Assemble the Tabletop: Arrange the tabletop planks side by side, ensuring they are aligned. Use clamps to hold the planks together. Apply wood glue to the edges of the planks and then screw them together using exterior-grade screws. Ensure the screws are countersunk to prevent them from protruding above the surface. Reinforce the underside of the tabletop by attaching support braces perpendicular to the planks. These braces provide additional stability and prevent sagging.
Step 3: Construct the Bench Seats: Repeat the same process as for the tabletop to construct the bench seats. Arrange the bench planks side by side, clamp them together, apply wood glue, and screw them together. Attach support braces to the underside of the bench seats for added stability.
Step 4: Build the Table Legs: Cut the lumber for the table legs to the desired length. The height of the table legs will determine the overall height of the table. Assemble the legs using screws and wood glue. Consider adding cross braces between the legs for increased stability.
Step 5: Attach the Table Legs to the Tabletop: Position the table legs at the corners of the tabletop. Use screws and wood glue to attach the legs to the underside of the tabletop. Ensure the legs are securely fastened and that the table is stable. Strengthening the connection between the legs and the tabletop is critical for long-term durability.
Step 6: Build the Bench Legs: Cut the lumber for the bench legs to the desired length. The height of the bench legs will determine the seating height. Assemble the legs using screws and wood glue. Consider using A-frame or angled legs for enhanced stability. The angle of the leg can be pre-calculated or determined through trial and error.
Step 7: Attach the Bench Legs to the Bench Seats: Position the bench legs at the ends of the bench seats. Use screws and wood glue to attach the legs to the underside of the bench seats. Ensure the legs are securely fastened and that the benches are stable. The bench legs must be attached firmly to avoid any wobble.
Step 8: Attach the Benches to the Table: Carefully position the completed benches on either side of the table, ensuring they are equidistant from the table’s edge. Secure the benches to the table legs using screws. This step creates the picnic table bench combo configuration.
Step 9: Sand the Surfaces: Use sandpaper to smooth all rough edges and surfaces. This will prevent splinters and create a more comfortable seating experience. Pay particular attention to the edges of the tabletop and bench seats.
Step 10: Apply Stain or Sealant: Apply a wood stain or sealant to protect the wood from the elements and enhance its appearance. Follow the manufacturer’s instructions for application. Allow the stain or sealant to dry completely before using the picnic table bench combo. Multiple coats may be necessary for optimal protection.
Enhancements and Customizations
Once the basic picnic table bench combo is assembled, several enhancements and customizations can be added to personalize the design and improve functionality.
Adding a Backrest: A backrest can significantly enhance the comfort of the benches. To add a backrest, attach vertical supports to the bench legs. Then, attach horizontal planks to the vertical supports to create the backrest. Ensure the backrest is angled slightly for optimal comfort.
Creating a Storage Compartment: A storage compartment can be built into the bench seats to provide a convenient place to store cushions, blankets, or other outdoor items. To create a storage compartment, build a box frame underneath the bench seat and attach a hinged lid. Adding a latch will secure the lid and prevent it from opening accidentally.
Incorporating an Umbrella Hole: An umbrella hole can be added to the center of the tabletop to provide shade on sunny days. Use a hole saw to drill a hole of the appropriate diameter in the center of the tabletop. Reinforce the hole with a metal ring to prevent splitting.
Adding Decorative Elements: Decorative elements such as carved designs, painted accents, or mosaic tiles can be added to personalize the picnic table bench combo. These additions can add a unique touch and reflect individual style.
Considerations for Accessibility: For individuals with mobility limitations, adjustments can be made to improve accessibility. Widening the space between the benches and the table allows for easier access. Ensuring that the seating height is appropriate can also enhance comfort. Leaving one end open without a bench allows for wheelchair access.
Building a picnic table bench combo is a rewarding project that can enhance any outdoor space. By following these guidelines and taking the time to plan and execute the construction process carefully, a durable, functional, and aesthetically pleasing piece of furniture can be created. Regular maintenance, such as cleaning and re-staining, will prolong the life of the picnic table bench combo and ensure years of enjoyment.

How To Make A Folding Picnic Table Bench Step By

Convertible Picnic Table And Bench Kreg Tool

Convertible Picnic Table And Bench Her Tool Belt

Folding Picnic Table Bench Plan Diy Combo Design

Picnic Table Bench Combo

Picnic Table And Bench Combo Plan Rockler Woodworking Hardware

How To Build A Trestle Table And Bench For Your Outdoor Space

This Picnic Table Transforms You Ve Never Seen One Like It

Folding Picnic Table Bench Plans Patio Furniture Digital

The Most Unique Diy Trestle Picnic Table Ever Strong Sy Beautiful