How to Make a Homemade Shuffleboard Table
Creating a shuffleboard table at home is a challenging but rewarding project. It requires careful planning, precise measurements, and a commitment to craftsmanship. This article provides a detailed guide to constructing a regulation-sized shuffleboard table, covering materials, tools, and step-by-step instructions. The result will be a high-quality game table suitable for years of enjoyment.
The dimensions of a regulation shuffleboard table are typically 22 feet long and 20 inches wide for the playing surface. However, this guide can be adapted to create smaller, more manageable table sizes for limited spaces. The key is to maintain accurate proportions and a smooth, level surface. The construction process is divided into several key stages: building the base, creating the playing surface, constructing the side rails and gutters, and applying the finishing touches.
Planning and Material Acquisition
Before commencing the actual construction, meticulous planning is essential. This includes determining the desired table size, creating detailed blueprints, and compiling a comprehensive materials list. It is advisable to research different wood types and their properties, considering factors such as durability, stability, and cost. Hardwoods like maple or birch are excellent choices for the playing surface due to their density and ability to withstand wear and tear. For the base and side rails, softwood like pine or fir can be used.
The required materials include:
* High-quality hardwood for the playing surface (e.g., maple, birch) * Softwood for the base and side rails (e.g., pine, fir) * Plywood or OSB for the frame and reinforcement * Wood glue * Screws (various sizes) * Sandpaper (various grits) * Polyurethane or epoxy resin for the finish * Felt or foam for the gutters to reduce noise * Shuffleboard wax (powder) * Shuffleboard pucks * Wood stain (optional) * Edge banding (optional)In addition to the materials, a well-equipped workshop is necessary. The essential tools are:
* Table saw * Circular saw * Miter saw * Planer (optional but recommended for achieving a perfectly flat surface) * Router with various bits * Sander (orbital and belt sander) * Drill and impact driver * Clamps (various sizes) * Measuring tape * Level * Square * Safety glasses * Dust maskConstructing the Base and Frame
The base provides the structural support for the shuffleboard table. It must be sturdy and level to ensure a consistent playing surface. The base typically consists of a frame made from softwood, reinforced with plywood or OSB.
Begin by cutting the lumber for the frame according to the planned dimensions. The frame should be rectangular, with crossbeams for added support. The number and spacing of the crossbeams will depend on the overall length of the table. Ensure all cuts are precise and square to avoid any racking or instability.
Assemble the frame using wood glue and screws. Clamping the joints during assembly ensures a strong and durable bond. Allow the glue to dry completely before proceeding to the next step.
Once the frame is assembled, attach plywood or OSB sheeting to the top to create a solid platform for the playing surface. This sheeting will also help to distribute the weight evenly across the base. Secure the sheeting with screws, ensuring they are countersunk to avoid any protrusions.
Leveling the base is crucial for a fair and accurate game. Use shims if necessary to achieve a perfectly level surface. Check the levelness in multiple directions to ensure there are no dips or slopes.
Creating and Finishing the Playing Surface
The playing surface is the most critical component of the shuffleboard table. It must be perfectly flat, smooth, and durable. Using high-quality hardwood, such as maple or birch, is highly recommended. The playing surface can be constructed from multiple boards joined together or from a single large panel of hardwood.
If using multiple boards, select boards with straight grain and minimal knots. Mill the boards to the desired thickness, ensuring they are all uniform. Use a planer to achieve a perfectly flat surface. Joint the edges of the boards to create a tight, seamless fit. Apply wood glue to the edges and clamp the boards together tightly. Allow the glue to dry completely before removing the clamps.
Once the glue is dry, sand the entire surface with progressively finer grits of sandpaper, starting with 80-grit and working up to 220-grit. Pay close attention to the joints between the boards, ensuring they are perfectly flush. A belt sander can be used for the initial sanding, followed by an orbital sander for the final smoothing.
After sanding, apply a thin coat of epoxy resin or polyurethane to seal the wood. This will protect the surface from moisture and wear. Follow the manufacturer's instructions for application and drying times. Multiple coats may be necessary to achieve a durable and glossy finish. Sand lightly between coats to remove any imperfections or bubbles.
The finish is critical to the playability of the surface. The goal is to create a very slick surface so pucks can easily slide. Many layers of epoxy are preferred by the professionals, however the level of gloss is often dependent on the player. The amount of gloss doesn't necessarily impact play, however the surface needs to be perfectly flat.
Finally, apply a layer of shuffleboard wax (powder) to the surface. This will further reduce friction and allow the pucks to glide smoothly. Distribute the wax evenly across the surface and brush off any excess.
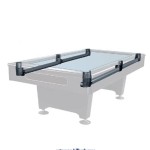
Constructing the Side Rails and Gutters
The side rails serve two purposes: to contain the pucks and to provide a visual boundary for the playing surface. The gutters are located beneath the side rails and catch the pucks when they fall off the table.
Cut the lumber for the side rails to the desired length and width. The height of the side rails should be sufficient to prevent the pucks from easily jumping off the table. A height of 2-3 inches is generally adequate. Miter the corners of the side rails for a clean and professional look.
Attach the side rails to the playing surface using wood glue and screws. Ensure the side rails are aligned perfectly with the edges of the playing surface. Clamp the side rails in place while the glue dries.
Construct the gutters from plywood or OSB. The gutters should be wide enough to catch the pucks and deep enough to prevent them from bouncing out. Attach the gutters to the underside of the side rails, ensuring they are securely fastened.
Line the gutters with felt or foam to reduce noise when the pucks fall into them. This will make the game more enjoyable for both players and observers. Secure the felt or foam with adhesive.
Applying the Finishing Touches
Once the main construction is complete, several finishing touches can be added to enhance the appearance and functionality of the shuffleboard table.
Consider adding edge banding to the edges of the playing surface and side rails. Edge banding provides a clean and professional look, and it also helps to protect the edges from damage. Apply the edge banding using a heat-activated adhesive or wood glue.
Wood stain can be applied to the base and side rails to enhance the natural beauty of the wood. Choose a stain that complements the color of the playing surface. Follow the manufacturer's instructions for application and drying times.
Install scoring markers along the side rails to help keep track of the score. These markers can be made from wood, metal, or plastic. Attach the markers securely to the side rails at appropriate intervals.
Finally, inspect the entire table for any imperfections or rough edges. Sand any rough spots and apply a final coat of finish if necessary. Clean the playing surface thoroughly and apply a fresh layer of shuffleboard wax.

How To Build A Shuffleboard Table Free Plans

Shuffleboard Table Rogue Engineer

How To Make A Shuffleboard Table With S Wikihow

Shuffleboard Table Rogue Engineer

Shuffleboard Table Rogue Engineer

Epic 14ft Shuffle Board Build

How To Make A Shuffleboard Table With S Wikihow

Shuffleboard Table Rogue Engineer
:max_bytes(150000):strip_icc()/43944-a1a854e4b01548fcb267e17b10ceaef1.jpg?strip=all "Tabletop Shuffleboard Woodworking Plan")
Tabletop Shuffleboard Woodworking Plan

Making A Shuffleboard Brunswick Style