How to Craft a Stunning Penny Table: A Step-by-Step Guide
A penny table, showcasing an intricate mosaic of pennies, is an eye-catching conversation piece that can enhance any home décor. Creating one may seem daunting, but with proper planning and attention to detail, it can be a rewarding experience. Here's a comprehensive guide to help you navigate the process:
1. Gather Materials
To begin, gather the following materials:
- Pennies (approx. 1,000-2,000 per square foot)
- Table (preferably with a smooth, flat surface)
- Epoxy resin
- Measuring cups and spoons
- Mixing sticks
- Sandpaper (fine and medium grit)
- Gloves
2. Prepare the Surface
Clean the table surface thoroughly to remove any dust, debris, or old finish. If necessary, sand the surface lightly with fine-grit sandpaper to create a slightly textured surface for better adhesion.
3. Design and Layout
Plan the design of your penny table carefully. Consider the size, shape, and color arrangement of the pennies. Sketch out your design on paper or use a software program for precision. Once satisfied, arrange the pennies on the table according to your plan.
4. Secure the Pennies
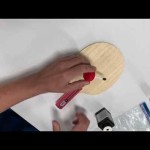
To keep the pennies in place, use small amounts of clear-drying epoxy resin. Apply a thin layer to the bottom of each penny and press it firmly onto the table. Allow the epoxy to cure for the recommended time before moving on.
5. Fill the Voids
Once all the pennies are secured, mix epoxy resin according to the manufacturer's instructions. Pour the resin carefully into any gaps between the pennies, filling them completely. Let the epoxy cure thoroughly.
6. Sand and Finish
Sand the surface with medium-grit sandpaper to remove any excess epoxy or rough edges. Repeat with fine-grit sandpaper for a smooth, polished finish. Apply a clear coat of polyurethane or varnish to protect and enhance the table's surface.
Additional Tips:
- Use a penny sorting machine to quickly sort and clean your pennies.
- Wear gloves when working with epoxy resin to avoid skin irritation.
- Ensure the table is level and stable before pouring the epoxy resin.
- Allow ample curing time for the epoxy resin to prevent cracking or warping.
- Experiment with different colors and textures of pennies to create unique designs.

How To Make A Penny Table

Heart Maine Home How To Make A Penny Top Table Diy

Making A Hexagonal Penny Table With Coating Beautiful

Diy Glaze Coated Penny Table Top Project Tops Furniture Makeover

Diy How To Make A Penny Top Table

Beromatic Penny Table

Penny Countertop Wildfire Interiors

How To Make A Penny Top Coffee Table Diy Tops

Penny Topped Table Upcycle My French Twist

Diy Penny Table Inspired