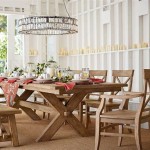
How to Make a Side Table Out of Pallets
Repurposing wood pallets is a popular and cost-effective method for creating unique furniture pieces. A side table, particularly one crafted from pallet wood, offers a rustic charm and an opportunity to showcase DIY skills. The construction process, while relatively straightforward, involves several key steps, from selecting the appropriate pallet to applying the finishing touches.
This article provides a comprehensive guide on how to construct a side table using reclaimed wooden pallets. The process encompasses material selection, preparation, assembly, and finishing, ensuring a durable and aesthetically pleasing final product.
Choosing and Preparing the Pallet
The first and arguably most crucial step is selecting a suitable pallet. Not all pallets are created equal, and certain types should be avoided. Look for pallets marked with an IPPC (International Plant Protection Convention) stamp. This stamp indicates that the pallet has been treated to prevent the spread of pests. Common treatments include heat treatment (HT) and kiln drying (KD), which are generally safe. Avoid pallets marked with "MB," which signifies methyl bromide fumigation, a highly toxic pesticide. Such pallets should not be used for furniture projects.
Once a safe pallet has been identified, assess its condition. Examine the wood for signs of rot, excessive wear, or significant damage. A pallet with minor imperfections can add character, but extensive damage could compromise the structural integrity of the side table. Consider the dimensions of the pallet and how they will translate into the finished side table. Standard pallet sizes vary, but common dimensions are 48" x 40" (1219 mm x 1016 mm) and 48" x 48" (1219 mm x 1219 mm). Choose a size that aligns with the intended use and available space.
Preparation of the pallet involves several stages, starting with cleaning. Use a stiff brush and soapy water to remove dirt, grime, and any loose debris. A pressure washer can expedite this process, but be cautious not to damage the wood. Allow the pallet to dry thoroughly before proceeding. This minimizes the risk of mold or mildew growth and prevents issues with wood warping during subsequent steps.
After cleaning, the pallet requires disassembly. This is often the most challenging part of the project. Use a pry bar and hammer to carefully separate the individual boards. Exercise caution to avoid splitting or cracking the wood. Consider using a reciprocating saw with a metal-cutting blade to cut through the nails or screws holding the pallet together. This method can be more efficient and less likely to damage the wood. However, ensure proper safety precautions, including wearing eye protection and gloves.
Once disassembled, remove any remaining nails or staples from the boards. A nail punch and hammer are useful for this purpose. Inspect each board for defects and select the best pieces for the side table construction. Discard any boards that are excessively damaged or unsuitable for use.
Following nail removal, the pallet wood needs to be sanded. Start with a coarse-grit sandpaper (e.g., 80-grit) to remove any rough patches or splinters. Gradually progress to finer grits (e.g., 120-grit, then 220-grit) to achieve a smooth surface. Sanding not only improves the appearance of the wood but also enhances its tactile feel, making the finished side table more comfortable to use.
Assembling the Side Table
The design of the side table can be simple or elaborate, depending on personal preference and skill level. A basic design typically consists of a tabletop, four legs, and potentially a lower shelf. Before beginning assembly, create a detailed plan or sketch outlining the dimensions and arrangement of the various components. This will serve as a guide and ensure that the finished side table meets the desired specifications.
For the tabletop, select several pallet boards of similar width and thickness. Arrange them side by side to form a rectangular or square surface. Secure the boards together using wood glue and screws. Alternatively, consider using pocket holes to create a stronger and more visually appealing joint. Clamps can be used to hold the boards in place while the glue dries.
The legs can be constructed from thicker pallet boards or from other suitable lumber. Cut the legs to the desired length, ensuring that they are all uniform. Attach the legs to the underside of the tabletop using wood glue and screws. Consider using corner braces or metal brackets to reinforce the joints and provide added stability. Ensure that the legs are positioned correctly and that the table is level.
If incorporating a lower shelf, cut additional pallet boards to the appropriate size. Attach the shelf to the legs using wood glue and screws. The height of the shelf is a matter of personal preference. A lower shelf can provide additional storage space or simply enhance the aesthetic appeal of the side table.
During the assembly process, it is essential to maintain squareness and alignment. Use a carpenter's square to ensure that corners are right angles and that the legs are perpendicular to the tabletop. Periodically check the alignment of the various components to prevent issues later in the construction process. Precise measurements and careful attention to detail are crucial for achieving a professional-looking result.
Once the main components are assembled, inspect all joints for strength and stability. Reinforce any weak points with additional screws or glue. Fill any gaps or imperfections with wood filler. Allow the filler to dry completely before sanding it smooth. This will create a seamless and professional finish.
Finishing the Side Table
The finishing stage is where the side table truly comes to life. The choice of finish depends on the desired aesthetic and the intended use of the table. Options include staining, painting, varnishing, and applying a protective oil or wax.
Staining the wood enhances its natural grain and adds depth and richness. Choose a stain color that complements the surrounding décor. Apply the stain evenly using a brush or cloth, following the manufacturer's instructions. Allow the stain to dry completely before applying a protective topcoat.
Painting the side table provides an opportunity to add color and personality. Choose a paint that is suitable for wood and apply several thin coats, allowing each coat to dry thoroughly before applying the next. A primer can be used to improve adhesion and prevent bleed-through.
Varnishing provides a durable and protective finish that is resistant to scratches, moisture, and UV damage. Apply several coats of varnish, sanding lightly between coats to create a smooth surface. Choose a varnish with a matte, satin, or gloss finish, depending on the desired level of sheen.
Applying a protective oil or wax provides a natural and subtle finish that enhances the wood's natural beauty. Options include linseed oil, tung oil, and beeswax. Apply the oil or wax liberally and allow it to soak into the wood. Wipe off any excess and buff the surface to a smooth sheen.
Before applying any finish, ensure that the surface is clean and free of dust or debris. Lightly sand the surface with fine-grit sandpaper (e.g., 220-grit) to create a smooth and uniform texture. Apply the finish in a well-ventilated area and follow the manufacturer's safety precautions.
After applying the finish, allow it to dry completely before using the side table. This ensures that the finish has fully cured and that the table is protected from damage. Inspect the finished table for any imperfections and touch up as needed.
Adding small details can further enhance the appearance of the side table. Consider adding decorative hardware, such as knobs or pulls, to the shelf. Alternatively, consider adding metal accents or decorative trim. These small details can add character and personalize the side table.
Ultimately, the process of creating a side table from pallets is a rewarding endeavor. It allows for the creation of a unique and functional piece of furniture while also promoting sustainability and resourcefulness. By following these guidelines, even novice DIY enthusiasts can create a stylish and durable side table that will be a cherished addition to any home.

Diy Rustic Side Table Made From Free Pallets

Diy Pallet Wood Coffee Table

How To Make The Perfect Pallet Coffee Table

12 Diy Pallet Side Tables End 101 Pallets Wooden Projects Home Decor Furniture

Diy Rustic Side Table Made From Free Pallets

Diy Rustic Pallet Side Table Making Maanita

Diy Rustic Side Table Made From Free Pallets

How To Make The Perfect Pallet Coffee Table

How To Make A Diy Bedside Table With Pallets 17 Steps

Make A Lift Top Coffee Table Out Of Pallets Diy Projects For Everyone