How To Mosaic a Round Table
Transforming a plain round table into a dazzling mosaic masterpiece is a rewarding project that combines creativity, patience, and a touch of artistic flair. Whether you're a seasoned DIY enthusiast or a novice crafter, this comprehensive guide will equip you with the essential knowledge and techniques to create a vibrant and unique centerpiece for your home.
1. Gather Your Materials and Tools
Before embarking on your mosaic journey, ensure you have all the necessary materials and tools at your disposal. A well-organized workstation will streamline your workflow and make the process more enjoyable.
Materials:
- Round table: Choose a sturdy table with a smooth surface, preferably made of wood or plywood.
- Mosaic tiles: Explore a variety of materials, including ceramic, glass, stone, or even salvaged materials. Choose a color palette and pattern that complements your decor.
- Adhesive: Opt for a strong, waterproof adhesive designed specifically for mosaics.
- Grout: Select a grout color that contrasts or complements the tiles. Consider using a pre-mixed grout for ease of use.
- Sealer: Protect your finished mosaic with a clear, water-based sealant.
- Safety gear: Wear safety glasses, gloves, and a dust mask to safeguard yourself during the process.
Tools:
- Grout float: A tool for applying and smoothing grout.
- Grout sponge: Used for removing excess grout.
- Tile nippers or cutter: To break tiles into smaller pieces for intricate designs.
- Rubber mallet: For gently tapping tiles into place.
- Pencil or marker: To mark tile placement.
- Measuring tape: To accurately determine tile dimensions.
- Level: For ensuring even tile placement.
- Bucket: To mix grout and clean tools.
- Old towels: To wipe up spills and excess adhesive.
2. Prepare the Table Surface
A well-prepared surface is crucial for a successful mosaic project. Ensure the table is clean, dry, and free of any debris or imperfections. Sanding the surface lightly can improve adhesion.
Steps:
- Clean the table surface thoroughly with soap and water, ensuring to remove any dust, grease, or wax residues. Allow it to dry completely.
- If needed, sand the table surface lightly with fine-grit sandpaper to create a smooth finish and improve adhesion.
- Apply a primer designed for wood or plywood to enhance the bonding properties of the adhesive.
3. Design and Layout Your Mosaic
Before applying any adhesive, carefully plan your mosaic design. Consider the size and shape of the table, the color scheme you want to achieve, and the desired level of complexity. It's helpful to create a template or sketch on paper.
Tips for design:
- Start with a simple design, such as a geometric pattern or a repeating motif.
- Experiment with different tile shapes and sizes for added visual interest.
- Use a variety of colors and textures to create depth and dimension.
- Consider incorporating decorative elements, such as glass beads or shells.
Layout methods:
- Dry layout: Arrange your chosen tiles on the table surface without adhesive to get a sense of the overall composition. This allows for adjustments before applying the adhesive.
- Paper template: Create a paper template with the tile arrangement and then use it as a guide for placement. This ensures accuracy and consistency.

Centering Mosaic Table Top Designs How To Blog

Learn How To Make A Mosaic Table The

Diy Mosaic Garden Table Design Glue Grout Finish

Result For Round Mosaic Patterns Free Beginners Patio Table Top Furniture

How To Mosaic A Table Running With Sisters

How To Mosaic A Table Running With Sisters

Mosaic Table Round Designer Glass Mosaics

Trash To Treasure Diy Mosaic Table Tutorial

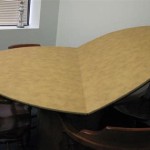
Mosaic Round Table Top

Mosaic Tables And Interior Design How To Blog