How To Stain a Table Top Gray
Achieving a beautifully stained gray table top can significantly enhance the aesthetic appeal of any room. The process, while seemingly straightforward, requires careful planning, appropriate preparation, and meticulous execution. The following guide provides a comprehensive overview of staining a table top gray, covering material selection, surface preparation, staining techniques, and sealing methods.
Before embarking on the staining process, it is crucial to select the right type of gray stain. Several factors influence this decision, including the type of wood the table top is made of, the desired shade of gray, and the overall look intended. Water-based stains tend to be more environmentally friendly and easier to clean up, while oil-based stains offer deeper color penetration and enhanced durability. Gel stains are particularly useful for non-porous surfaces or for achieving a more uniform color on woods with varying grain patterns. Experimenting with different stain samples on an inconspicuous area of the table top is highly recommended to ensure the desired color and finish are achieved.
Beyond the stain itself, several essential materials and tools are needed. These include sandpaper in varying grits (typically ranging from 120 to 220), a sanding block or orbital sander, tack cloths, wood filler (if necessary), a pre-stain wood conditioner (optional but often recommended), stain applicators (such as brushes, rags, or foam pads), gloves, safety glasses, and a respirator. A well-ventilated work area is also paramount for safety and to ensure proper drying of the stain and sealant.
Preparing the Table Top for Staining
The success of any staining project hinges on proper surface preparation. A clean, smooth, and uniform surface ensures optimal stain absorption and a flawless final product. The initial step involves removing any existing finish from the table top. This can be accomplished using a chemical stripper or by sanding. Chemical strippers are effective for removing multiple layers of finish, but they require careful handling due to their potentially hazardous nature. Sanding, on the other hand, is a more mechanical process that involves gradually removing the old finish with progressively finer grits of sandpaper.
When sanding, begin with a coarser grit, such as 120-grit, to remove the bulk of the existing finish. Work in the direction of the wood grain to avoid creating unsightly scratches. As the old finish is removed, transition to finer grits, such as 180-grit and then 220-grit, to smooth the surface. Thoroughly remove all sanding dust between each grit using a tack cloth or vacuum. Pay particular attention to edges and corners, as these areas are often difficult to sand evenly. The objective is to achieve a uniformly smooth surface that is receptive to the stain.
After removing the existing finish, carefully inspect the table top for any imperfections, such as scratches, dents, or cracks. These imperfections must be addressed before staining, as the stain will accentuate them. Use wood filler to fill any gaps or voids. Apply the wood filler according to the manufacturer's instructions, ensuring that it is level with the surrounding surface. Once the filler has dried completely, sand it smooth using fine-grit sandpaper (220-grit or finer) to blend it seamlessly with the surrounding wood. Again, remove all sanding dust using a tack cloth or vacuum.
Finally, consider applying a pre-stain wood conditioner. This product helps to ensure even stain absorption, particularly on softwoods or woods with varying grain densities. Wood conditioners work by partially sealing the wood pores, preventing the stain from being absorbed unevenly, which can lead to blotchy or inconsistent color. Apply the wood conditioner according to the manufacturer's instructions and allow it to dry completely before proceeding with the staining process.
Applying the Gray Stain
With the table top properly prepared, the staining process can commence. Before opening the can of stain, thoroughly stir the contents to ensure that the pigments are evenly distributed. This is crucial for achieving a consistent color across the entire surface. Apply the stain using a brush, rag, or foam pad, working in the direction of the wood grain. If using a brush, apply the stain in long, even strokes, avoiding excessive overlap. If using a rag or foam pad, apply the stain in a circular motion, ensuring that all areas are evenly coated.
Allow the stain to penetrate the wood for the amount of time recommended by the manufacturer. This penetration time typically ranges from 5 to 15 minutes, depending on the type of stain and the desired color intensity. The longer the stain is left on the surface, the darker the resulting color will be. After the recommended penetration time has elapsed, use a clean rag to wipe off any excess stain. This step is crucial for preventing a sticky or uneven finish. Work in the direction of the wood grain to remove the excess stain, ensuring that no streaks or puddles remain.
For a darker or more intense gray color, a second coat of stain can be applied. Allow the first coat of stain to dry completely before applying the second coat. Lightly sand the table top with fine-grit sandpaper (320-grit or finer) between coats to ensure a smooth surface. Remove all sanding dust before applying the second coat of stain. Repeat the staining process, allowing the second coat to penetrate for the recommended time and then wiping off any excess stain. Continue applying coats of stain until the desired color depth is achieved, remembering to allow each coat to dry completely and lightly sand between coats.
Sealing and Protecting the Stained Table Top
Once the stain has dried completely, sealing the table top is essential to protect it from damage and enhance its durability. Sealants, such as polyurethane or varnish, create a protective barrier that resists scratches, stains, and moisture. Polyurethane is a popular choice for table tops due to its durability and resistance to spills. Varnish offers a more traditional look and can be applied with a brush or sprayer.
Before applying the sealant, ensure that the stained surface is clean and free of dust. Lightly sand the table top with fine-grit sandpaper (320-grit or finer) to create a smooth surface for the sealant to adhere to. Remove all sanding dust using a tack cloth or vacuum. Apply the sealant according to the manufacturer's instructions, using a brush, sprayer, or rag. Work in the direction of the wood grain, applying thin, even coats. Avoid applying too much sealant at once, as this can lead to drips and runs.
Allow the first coat of sealant to dry completely before applying subsequent coats. Lightly sand the table top with very fine-grit sandpaper (400-grit or finer) between coats to remove any imperfections and create a smooth surface for the next coat to adhere to. Remove all sanding dust before applying each coat of sealant. Typically, two to three coats of sealant are recommended for adequate protection. The number of coats may vary depending on the type of sealant used and the desired level of durability.
After the final coat of sealant has dried completely, allow the table top to cure for the recommended time before using it. Curing allows the sealant to fully harden and achieve its maximum durability. The curing time can range from several days to several weeks, depending on the type of sealant used. Avoid placing heavy objects on the table top during the curing process. Once the sealant has cured, the table top is ready for use and will provide years of enjoyment.
Maintaining the newly stained and sealed table top involves regular cleaning and care. Use a soft, damp cloth to wipe away spills and dirt. Avoid using harsh chemicals or abrasive cleaners, as these can damage the finish. Consider using furniture polish to enhance the shine and protect the sealant. With proper care, the stained gray table top will remain beautiful and durable for many years to come.

Weathered Gray Coffee Table Centsational Style

Weathered Gray Coffee Table Centsational Style

The Easy Way To Create A Weathered Wood Stain On Furniture

The Perfect Grey Wood Stain Handyman S Daughter

Graystone Table General Finishes Design Center

The Perfect Grey Wood Stain Handyman S Daughter

Make It A Farmhouse Table Grey Stained Wood Staining Furniture

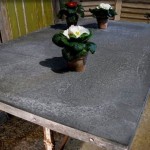
Gray Gel Stained Table Top General Finishes Design Center

Weathered Gray Coffee Table Centsational Style

How To Refinish A Table Sand And Sisal