Reclaimed Wood Console Table DIY: A Timeless Addition to Your Home
Incorporating reclaimed wood into your home decor not only adds a touch of rustic charm but also embodies sustainability and reduces waste. A reclaimed wood console table is an excellent way to add character and functionality to your living space.
This guide will walk you through the essential steps of creating your own reclaimed wood console table, empowering you to create a unique and durable piece that will complement your home for years to come.
Choosing the Right Reclaimed Wood
The choice of reclaimed wood you select will impact the overall look and style of your console table. Consider the following factors:
- Species: Different wood species, such as oak, pine, or mahogany, have varying colors and grain patterns.
- Age: Older wood tends to have more character and patina, while newer wood may appear more polished.
- Source: Repurposing wood from old barns, warehouses, or demolished buildings ensures a genuinely reclaimed aesthetic.
Gathering Tools and Materials
Before you begin, gather the necessary tools and materials:
- Reclaimed wood planks
- Table saw or miter saw
- Sander (orbital or belt sander)
- Wood glue
- Clamps
- Wood screws
- Drill
- Countersink tool
- Finishing materials (stain, paint, or clear finish)
Preparing the Wood
Begin by cutting the reclaimed wood planks to the desired length and width for the tabletop and legs of the console table.
Next, sand the wood to remove splinters and smooth the surface. Sanding will also help to reveal the wood's natural grain and character.
Assembling the Tabletop
Arrange the wood planks side by side on a flat surface, aligning the edges. Apply wood glue to the edges and clamp the planks together tightly.
Let the glue dry completely. Once dry, reinforce the tabletop by driving wood screws through the top and into the underside of the planks.
Building the Legs
Cut the wood planks for the legs to the desired length. Assemble the legs by gluing and clamping them together into an "L" shape.
Repeat this step for the remaining legs. Countersink the screws for a flush finish.
Attaching the Legs to the Tabletop
Position the legs at the corners of the tabletop and secure them with wood screws. Countersink the screws to create a seamless appearance.
Reinforce the legs by adding corner braces or metal brackets for added stability.
Finishing the Console Table
Finish the console table with a protective coating. Choose from a stain to enhance the wood's natural color, a paint to match your decor, or a clear finish to preserve its reclaimed character.
Apply multiple coats of the finish, allowing each coat to dry completely before applying the next. Sand lightly between coats to ensure a smooth finish.
Congratulations! You have now created a unique and timeless reclaimed wood console table that will add a touch of rustic charm and history to your home.

How I Built A 2650 Rh Inspired Console Table For Free Anderson Grant

Diy Wood Console Table Grace Oaks Designs

Diy Wood Console Table Grace Oaks Designs

Diy Wood Console Table Grace Oaks Designs

How I Built A 2650 Rh Inspired Console Table For Free Anderson Grant

How I Built A 2650 Rh Inspired Console Table For Free Anderson Grant

How To Make A Cute Diy Console Table Out Of Reclaimed Wood Hometalk

Diy Chunky Rustic Console

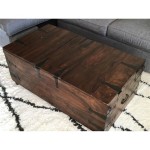
Diy Reclaimed Sofa Table Tutorial Picklee

Diy Wood Console Table Grace Oaks Designs
Related Posts