Refinishing A Metal Patio Table
Metal patio tables, renowned for their durability and aesthetic appeal, often endure significant weathering over time. Exposure to the elements—sun, rain, snow, and fluctuating temperatures—can lead to rust, chipping paint, and general surface degradation. Refinishing a metal patio table not only revitalizes its appearance but also extends its lifespan, protecting the underlying metal from further corrosion and decay. This process, while requiring time and effort, is a cost-effective alternative to replacing the entire table.
Effective refinishing necessitates a systematic approach, beginning with thorough preparation and culminating in the application of protective coatings. Neglecting any step can compromise the final result and reduce the longevity of the refinished surface. The following guide outlines the essential steps involved in successfully refinishing a metal patio table, ensuring a professional-looking and durable outcome.
Key Point 1: Preparation and Surface Assessment
The initial phase of refinishing involves a comprehensive assessment of the table's condition. This assessment determines the extent of rust, paint damage, and other surface imperfections. It also informs the selection of appropriate tools and materials for the subsequent steps. A meticulous assessment is critical for achieving optimal results, as it dictates the level of surface preparation required.
Begin by thoroughly cleaning the table. Use a mixture of warm water and a mild detergent to remove dirt, grime, and loose debris. A scrub brush or sponge can be used to agitate the surface and loosen stubborn contaminants. Rinse the table thoroughly with clean water and allow it to dry completely. This initial cleaning removes surface impurities that could interfere with subsequent steps.
Once the table is clean and dry, carefully inspect it for signs of rust. Rust is a common issue with metal patio furniture, especially in areas exposed to high humidity or frequent rainfall. Small areas of surface rust can often be removed with abrasive tools. However, extensive rust may require more aggressive methods, such as chemical rust removers or professional sandblasting.
Examine the existing paint finish for chipping, peeling, or blistering. Loose or damaged paint must be removed to create a smooth and uniform surface for the new finish. Depending on the extent of the damage, various methods can be employed, including scraping, sanding, or using chemical paint strippers.
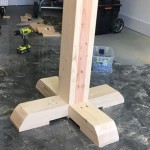
Document any structural damage, such as loose welds or bent legs. These issues should be addressed before proceeding with the refinishing process. Welding repairs often require the expertise of a professional welder, while minor bends can sometimes be corrected with hand tools. Neglecting structural repairs can compromise the stability and safety of the table.
Gather all necessary tools and materials based on the assessment. This includes sandpaper of varying grits, wire brushes, scrapers, chemical paint stripper (if needed), rust converter (if needed), safety glasses, gloves, dust mask, primer, and paint. Having all the necessary materials readily available streamlines the refinishing process and minimizes interruptions.
Key Point 2: Rust Removal and Surface Smoothing
Effective rust removal is paramount to ensuring a durable and long-lasting finish. Rust, if left untreated, will continue to corrode the underlying metal, eventually undermining the new paint finish. Several methods can be used to remove rust, each with its own advantages and disadvantages.
For light surface rust, manual sanding with abrasive sandpaper is often sufficient. Start with a coarse grit sandpaper (e.g., 80-grit) to remove the bulk of the rust, then gradually progress to finer grits (e.g., 120-grit, 220-grit) to smooth the surface. Use a sanding block to maintain a consistent pressure and avoid creating uneven surfaces. Wear a dust mask and safety glasses to protect against airborne particles.
Wire brushes, either hand-held or attached to a power drill, are also effective for removing rust. Wire brushes are particularly useful for reaching into corners and crevices where sandpaper may not be effective. Exercise caution when using a power drill with a wire brush, as the brush can easily catch on edges and fling debris.
Chemical rust removers are a potent option for dealing with stubborn or widespread rust. These products typically contain phosphoric acid or other chemicals that dissolve rust and convert it into a stable compound. Follow the manufacturer's instructions carefully when using chemical rust removers, as they can be corrosive and harmful if mishandled. Wear appropriate protective gear, including gloves, safety glasses, and a respirator.
For heavily rusted tables, sandblasting may be the most effective solution. Sandblasting involves using compressed air to propel abrasive particles (e.g., sand, glass beads) against the metal surface, effectively removing rust and old paint. Sandblasting is typically performed by professionals due to the specialized equipment and safety precautions required. It is advisable to consider a professional service for large or intricate metal patio tables.
After removing the rust, thoroughly clean the surface to remove any residual dust or debris. Use a tack cloth or a clean, damp cloth to wipe down the table. Ensure the surface is completely dry before proceeding to the next step.
Once the rust is removed, address any remaining surface imperfections, such as dents or scratches. Use body filler or metal putty to fill in these imperfections and create a smooth, even surface. Allow the filler to dry completely according to the manufacturer's instructions, then sand it smooth with fine-grit sandpaper.
Key Point 3: Priming and Painting for Protection
Priming is an essential step in the refinishing process. Primer acts as a base coat, providing a uniform surface for the paint to adhere to. It also helps to seal the metal surface, preventing rust from reoccurring. Selecting the right type of primer is crucial for achieving optimal results.
For metal patio tables, a rust-inhibiting primer is highly recommended. These primers contain chemicals that help to prevent rust from forming, even if the paint finish is damaged. Apply the primer in thin, even coats, following the manufacturer's instructions. Allow each coat of primer to dry completely before applying the next. Two coats of primer are generally recommended for optimal protection.
Apply the primer using either a brush, roller, or spray gun. Spray guns are generally preferred for achieving a smooth, even finish, but they require more skill and experience to use effectively. Brushes and rollers are more suitable for smaller projects or for those with limited experience. When using a brush or roller, apply the primer in long, even strokes, avoiding excessive brush marks or roller stipple.
Once the primer is dry, lightly sand the surface with fine-grit sandpaper (e.g., 320-grit) to remove any imperfections or rough spots. This will help to create a smooth, even surface for the paint to adhere to. Wipe down the surface with a tack cloth to remove any sanding dust.
Choosing the right paint is equally important. Select a paint that is designed for outdoor use and is resistant to weathering, fading, and chipping. Acrylic latex paints are generally a good choice for metal patio furniture, as they are durable, easy to apply, and available in a wide range of colors. Oil-based paints offer superior durability and resistance to wear and tear, but they require more time to dry and are more difficult to clean up.
Apply the paint in thin, even coats, following the manufacturer's instructions. Allow each coat of paint to dry completely before applying the next. Two or three coats of paint are typically required to achieve full coverage and a durable finish. Avoid applying the paint too thickly, as this can lead to drips and runs.
When applying paint, consider factors like temperature and humidity. High humidity can affect the drying time and the adhesion of the paint. Ideally, paint in a well-ventilated area with moderate temperature and low humidity. Protect the surrounding area with drop cloths or masking tape to prevent overspray.
Once the final coat of paint is dry, allow the table to cure for several days before using it. Curing allows the paint to fully harden and bond to the surface, ensuring a durable and long-lasting finish. Avoid placing heavy objects on the table or subjecting it to extreme weather conditions during the curing process.
For added protection, consider applying a clear coat sealant over the paint finish. Clear coat sealants provide an extra layer of protection against scratches, UV damage, and weathering. Apply the sealant in thin, even coats, following the manufacturer's instructions. Allow the sealant to dry completely before using the table.
By meticulously following these steps, a metal patio table can be effectively refinished, restoring its aesthetic appeal and extending its lifespan. The result is a revitalized piece of furniture that can withstand the elements and provide years of enjoyment.

How To Paint Metal Patio Furniture So It Looks Like A Million Bucks

How To Paint Metal Patio Furniture

How To Paint Metal With Rust Oleum Universal

How To Spray Paint Metal Outdoor Furniture Last A Long Time H2obungalow

Painting Metal Patio Furniture How To The Mom Of Year

How To Paint Metal Patio Furniture So It Looks Like A Million Bucks

How To Paint Metal Patio Furniture

How To Paint Metal Patio Furniture Green With Decor

How To Paint Metal Patio Furniture With Spray Joyful Derivatives

How To Refinish Metal Patio Furniture That S Covered In Rust
Related Posts