Tiling a Kitchen Table Top: A Comprehensive Guide
Tiling a kitchen table top presents an opportunity to transform an ordinary piece of furniture into a durable and aesthetically pleasing centerpiece. This project, while demanding attention to detail, is entirely achievable for a homeowner with basic DIY skills. The resulting surface is not only visually appealing but also resistant to heat, water, and scratches, making it ideal for kitchen use. This article will provide a step-by-step guide to tiling a kitchen table top, covering the necessary materials, preparation techniques, tiling procedures, grouting, and sealing.
Preparing the Table Surface
Proper preparation of the table surface is paramount to ensuring a successful and long-lasting tiling project. The existing table top's material and condition will dictate the specific preparation steps required. A smooth, stable, and clean surface is essential for optimal tile adhesion. If the existing table top is made of wood, it is crucial to address any imperfections before proceeding.
Firstly, thoroughly clean the table top with a degreasing cleaner to remove any dirt, grease, or wax. This step is crucial for ensuring proper adhesion of the subsequent layers. After cleaning, inspect the surface for any imperfections, such as cracks, dents, or uneven areas. Minor imperfections can be filled with wood filler, allowing it to dry completely, and then sanding it smooth with fine-grit sandpaper. More significant damage may necessitate replacing the existing table top altogether.
Next, consider the existing surface's porosity. A non-porous surface, such as laminate or metal, will require etching or priming to provide a suitable bonding surface for the tile adhesive. Etching involves applying a chemical etcher to roughen the surface, creating microscopic grooves that allow the adhesive to grip. Priming, on the other hand, involves applying a specifically formulated primer that chemically bonds to the existing surface and provides a porous layer for the adhesive to adhere to. Choose a primer specifically designed for the material of your table top and follow the manufacturer's instructions carefully.
For wooden table tops, applying a layer of cement board or a similar backer board is highly recommended. This provides a stable and waterproof substrate for the tiles, preventing moisture from seeping into the wood and causing warping or damage over time. Cut the backer board to the exact dimensions of the table top and secure it using construction adhesive and screws. Ensure the screws are countersunk to be flush with the surface of the backer board. The stability of the backer board installation directly impacts the stability and longevity of the tiled surface.
Finally, before applying the tile adhesive, ensure the prepared surface is completely clean and free of dust or debris. Vacuum the surface thoroughly and wipe it down with a damp cloth. Allowing the surface to dry completely before applying the adhesive is crucial for optimal bonding.
The Tiling Process
With the table surface properly prepared, the tiling process can begin. This stage requires careful planning, precise measurements, and meticulous execution to achieve a professional-looking finish. Selecting the appropriate tile adhesive and applying it correctly are essential for secure and durable tile adhesion.
First, dry-lay the tiles on the table top to determine the optimal layout and ensure a balanced and symmetrical appearance. This step allows you to visualize the finished product and make any necessary adjustments to tile placement before committing to the adhesive. Consider the placement of tiles that may require cutting, aiming to minimize the number of cuts and position them in less conspicuous areas, such as along the edges of the table.
Once the layout is finalized, mark the center lines of the table top both lengthwise and widthwise. These lines will serve as a reference point for starting the tiling process and ensuring symmetry. Using a notched trowel, apply a thin, even layer of tile adhesive to a small section of the table top, starting at the intersection of the center lines. The size of the notched trowel will depend on the size and type of tile being used; refer to the tile adhesive manufacturer's recommendations for the appropriate trowel size.
Press the tiles firmly into the adhesive, ensuring they are level and aligned with the marked center lines. Use tile spacers to maintain consistent grout lines between the tiles. The size of the tile spacers will determine the width of the grout lines; choose a spacer size that complements the size and style of the tiles. Periodically check the level of the tiles using a level and make any necessary adjustments before the adhesive sets.
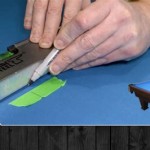
Continue applying adhesive and setting tiles in small sections, working outwards from the center lines. As you reach the edges of the table, you will likely need to cut some tiles to fit. Use a wet saw or a tile nipper to make precise cuts, following the measurements taken during the dry-lay process. Wear safety glasses and gloves when cutting tiles to protect yourself from flying debris and sharp edges.
After all the tiles are set, allow the adhesive to cure completely according to the manufacturer's instructions. This typically takes 24 to 48 hours. Avoid putting any weight on the table top during this time to allow the adhesive to fully bond.
Grouting and Sealing
Grouting fills the gaps between the tiles, creating a seamless surface and preventing water from seeping beneath the tiles. Sealing the grout protects it from stains and mildew, prolonging its lifespan and maintaining the aesthetic appeal of the tiled table top. Both grouting and sealing are crucial steps in ensuring a durable and aesthetically pleasing finished product.
Once the tile adhesive has fully cured, remove the tile spacers. Using a grout float, apply the grout to the tile surface, pressing it firmly into the grout lines. Work in diagonal strokes to ensure the grout completely fills the gaps. Remove excess grout from the tile surface with the grout float, holding it at a 45-degree angle.
After the grout has partially dried, typically after 15 to 30 minutes, use a damp sponge to clean the tile surface. Wring out the sponge frequently and avoid using too much water, as this can weaken the grout. Clean the grout lines with a grout sponge, shaping them to create a smooth and consistent appearance. Rinse the sponge frequently and continue cleaning until all excess grout is removed from the tile surface.
Allow the grout to cure completely according to the manufacturer's instructions, typically for 24 to 72 hours. Once the grout is fully cured, apply a grout sealer to protect it from stains and mildew. Use a grout brush or a small applicator to apply the sealer to the grout lines, following the manufacturer's instructions. Wipe off any excess sealer from the tile surface with a clean cloth. Allow the sealer to dry completely before using the table top.
Finally, inspect the finished tiled table top for any imperfections or areas that require touch-up. If necessary, apply additional grout or sealer to ensure a seamless and durable surface. With proper care and maintenance, a tiled kitchen table top can provide years of reliable service and enhance the aesthetic appeal of your kitchen.

Tile Top Table Makeover Updating A With Wood Part 1 Southern Revivals

Interior Of Modern Kitchen Table Top Made Wood Apron Ceramic Tiles With Ornament Stainless Steel Sink Stock Photo Adobe

Techniques Install Kitchen Table With Ceramic Tiles Construction Design

Volga Blue Color Kitchen Counter Top Table The Tiles House

Building Concrete Kitchen Cooking Table Granite Process Smart Technique To Install Ceramic

Matching Your Kitchen Carts To Tiles Aesthetics Niro Granite

Oriental White Marble Stone For Slabs Tiles Kitchen Countertop Vanity Table Top Flooring Background Wall Panel Floor Tile China Made In Com

Portoro Black Color Kitchen Counter Top Table The Tiles House

Tile Top Table Makeover Updating A With Wood Part 1 Southern Revivals

Marble Stone Pattern Wallpaper Kitchen Tiles Cabinet Table Top Background Furniture Renovation Waterproof Pvc
Related Posts